Using Burpsuite
July 9th, 2019
Reminder: This is for education purposes only, it is not meant for any criminal act or illegal activity.
The tool Burpsuite is very powerful. It can intercept the web traffic, alter the header request, and send altered request. Other services it provides are providing are crawling websites with a spider, bruteforce attack, and many others. For this tutorial, we will intercept our computer’s request and alter the request a bit. Burpsuite is already installed in Kali Linux so you do not need to download it.
Open Burpsuite to start using it. The tool will show the tool starting. 
When the Burpsuite starts, it will show this form window.
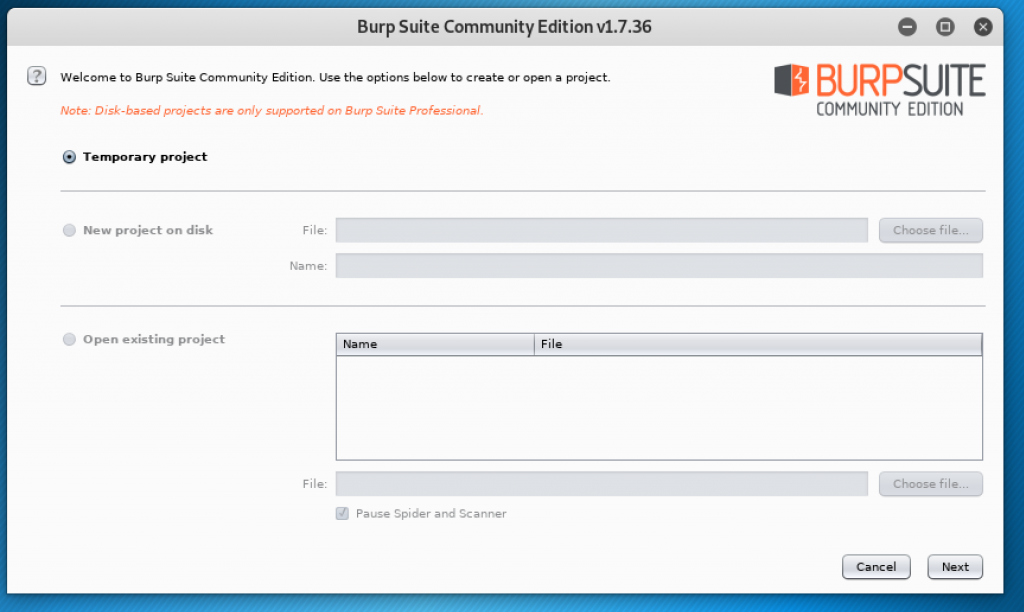
Click on Next. Then the window will show another form asking for the configuration.
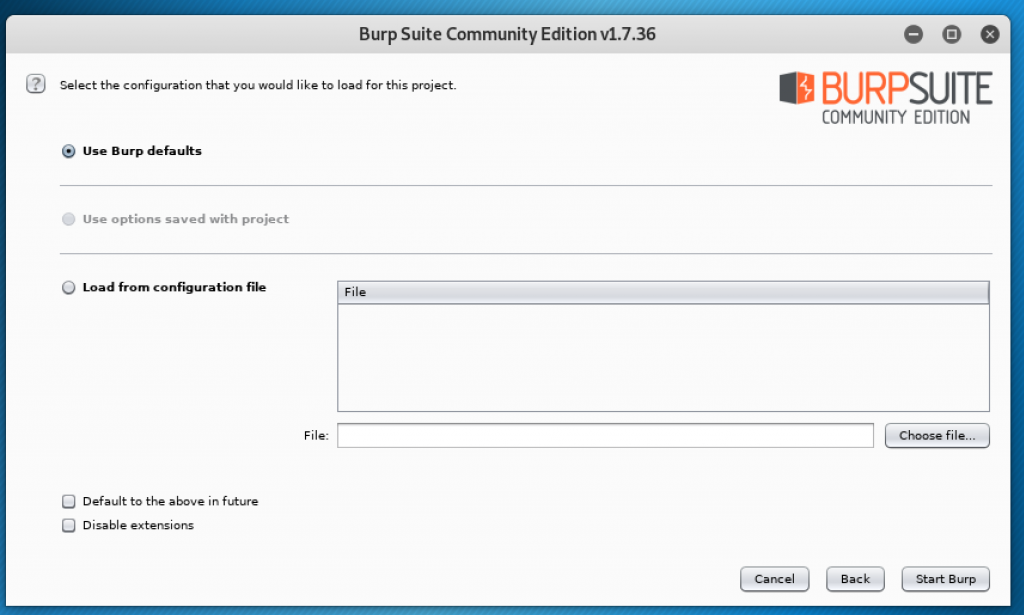
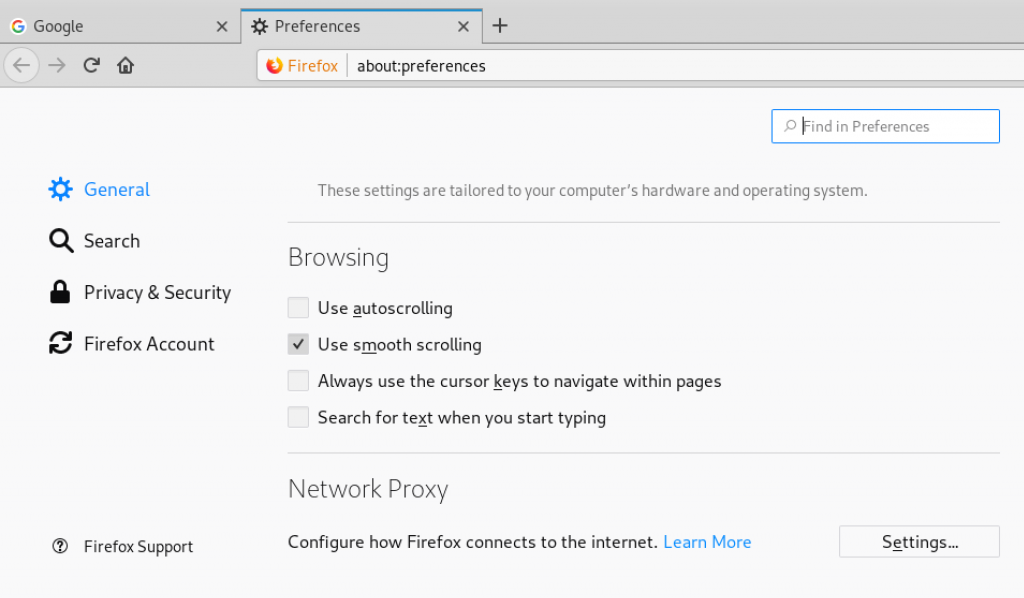
It will choose “Use Burp defaults” by default and then you can begin by clicking on Start Burp. After that, we need to configure the browser so that the Burpsuite can intercept our computer’s requests. Go to your browser and open the preferences or settings.
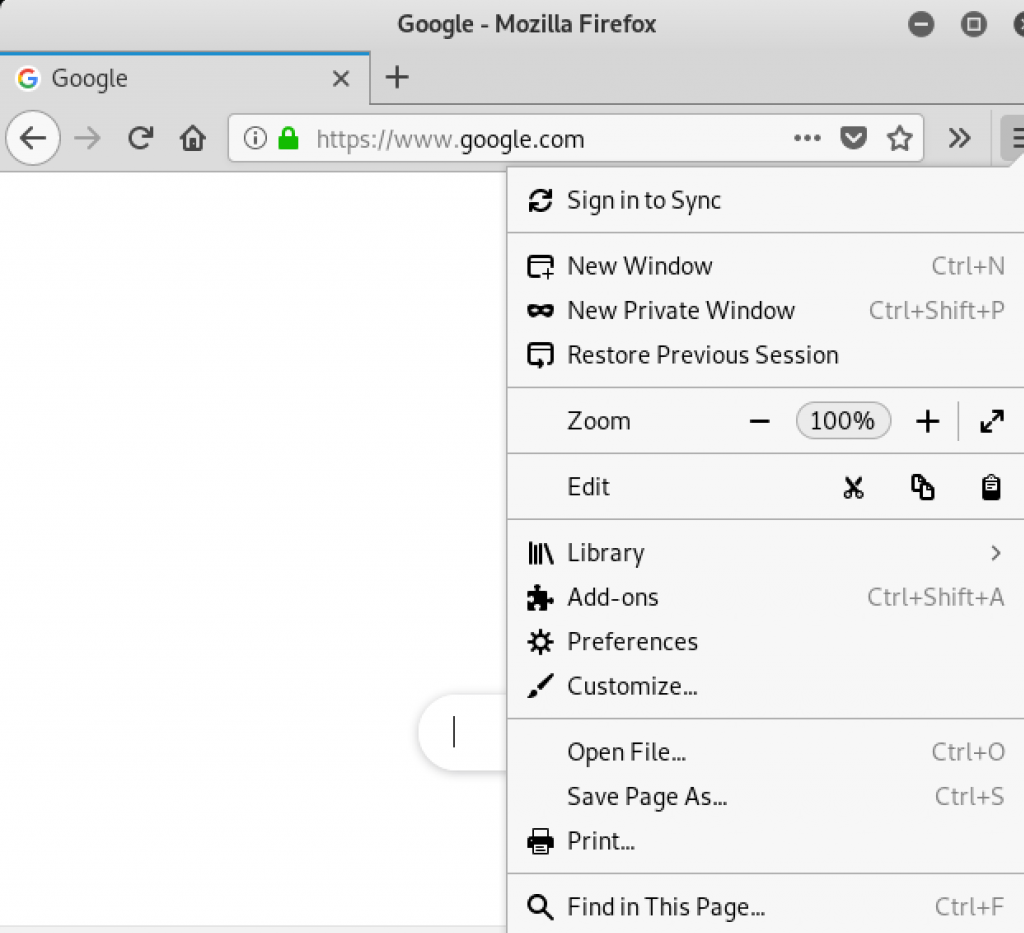
Go to the Network section and click on the Settings. Click on manual proxy and type 127.0.0.1 (localhost) into the empty field and type 8080 for the port number.

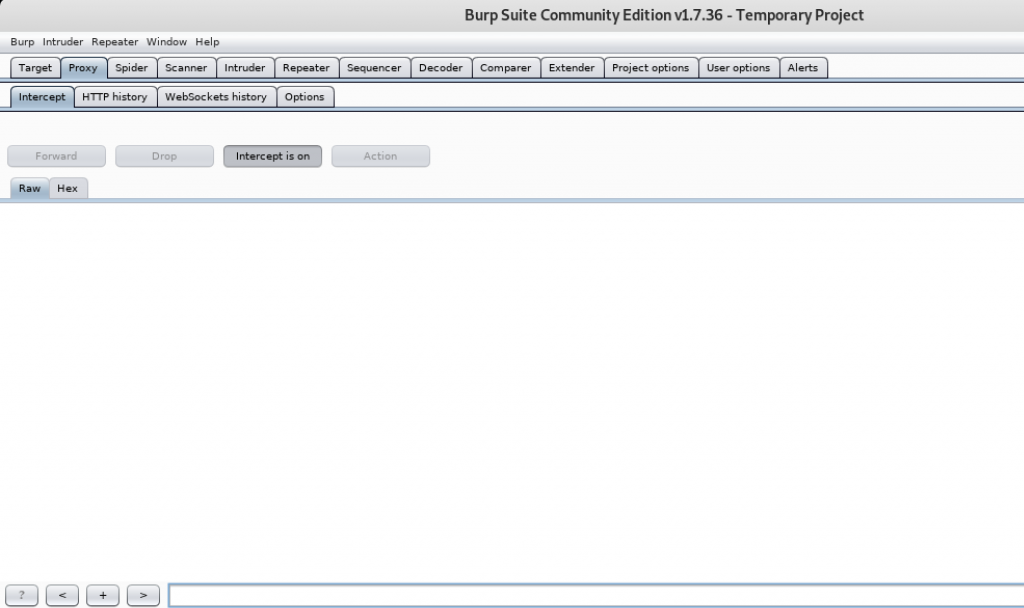
Remember to save the changes and go to Burpsuite to begin the intercept. Open the Proxy tab and make sure intercept is on.
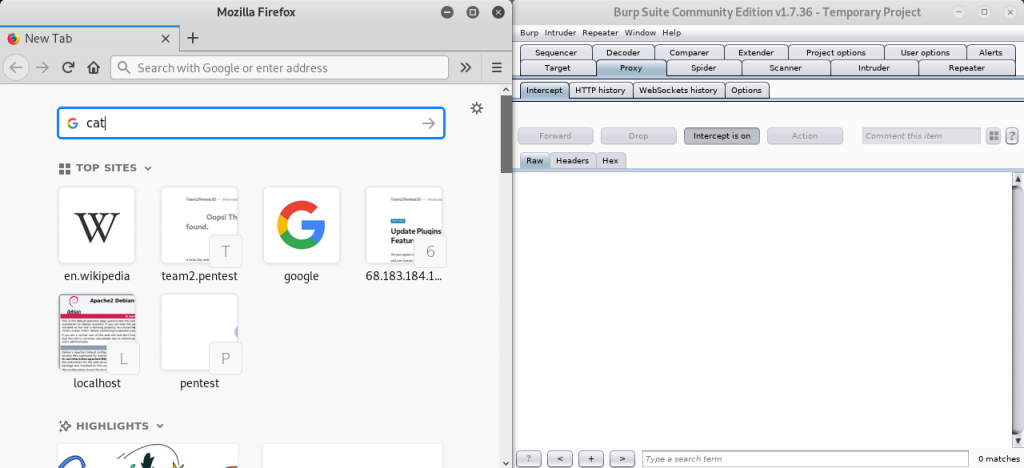
Return back to the browser and search in search engine for anything or open any links to website. I searched for cat.
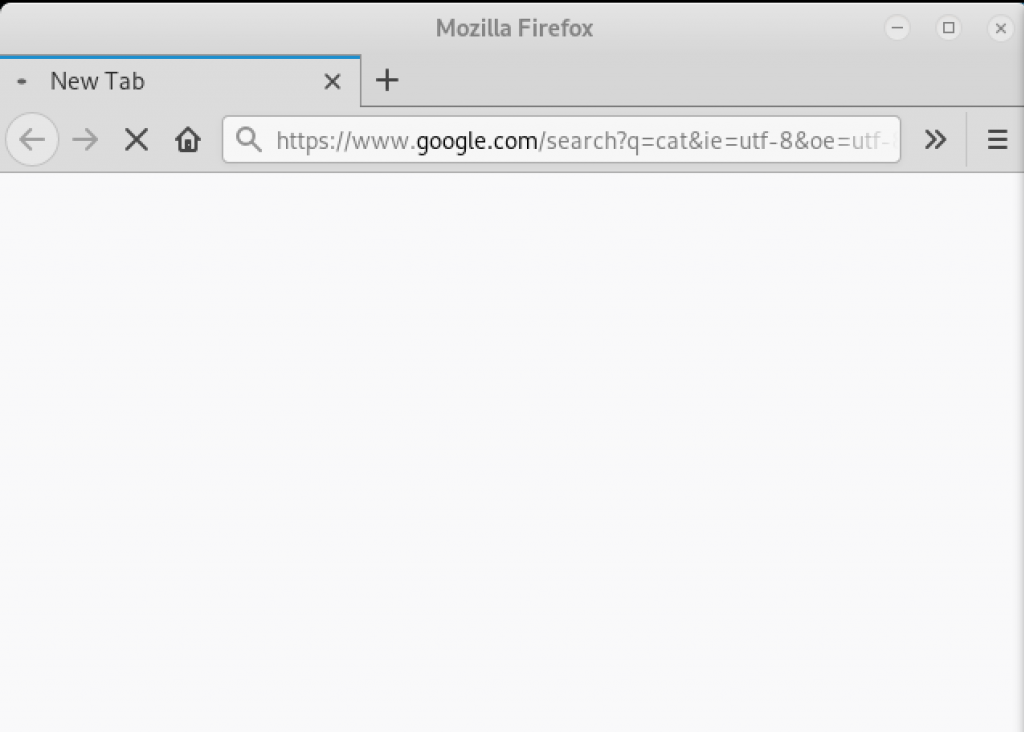
If the page doesn’t load, then the request is intercepted successfully.
Check Burpsuite for the information of the request sent to search for cat.
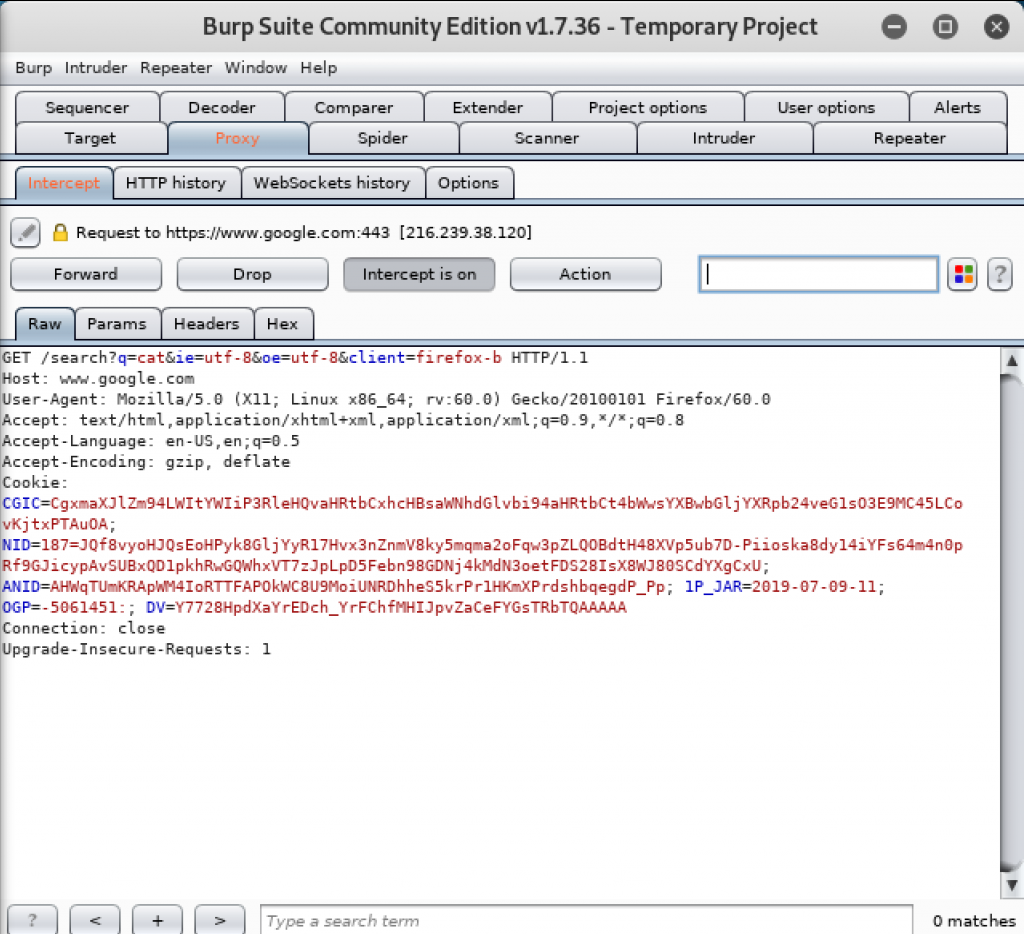
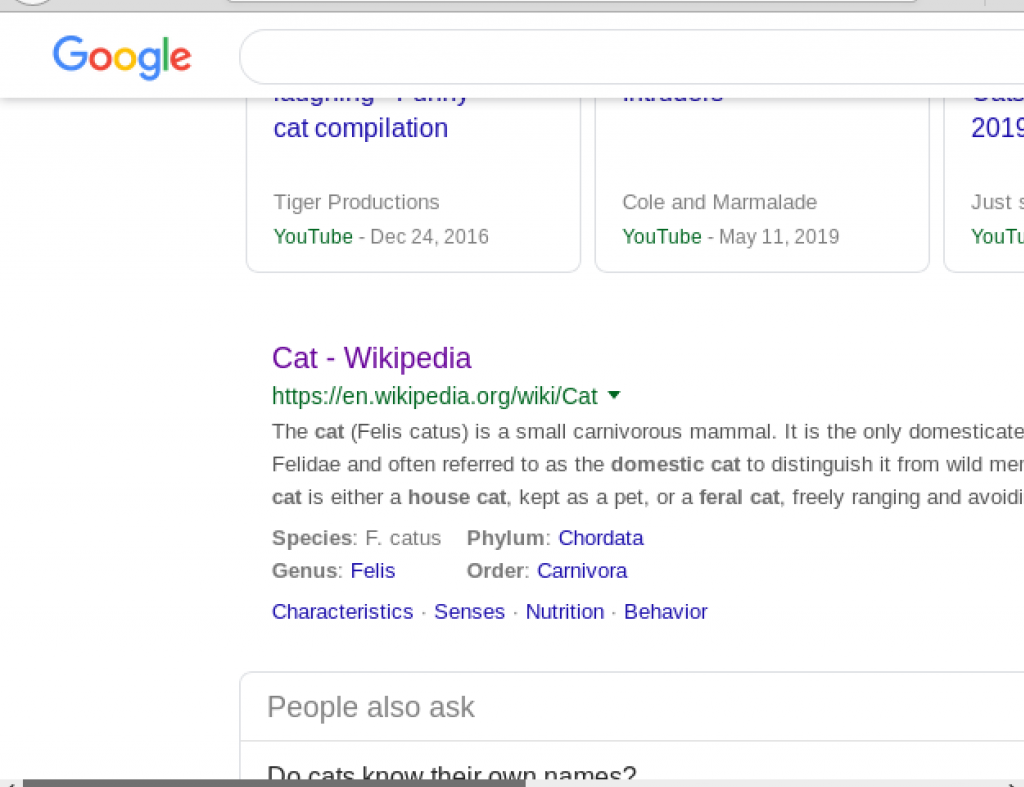
Since the request is being held in Burpsuite, the page will not load until the request is passed to the destination server to be processed. Click on Forward to send the request. The website will load.
If you cannot use Burpsuite because the response returned is SSL Error on the browser, try to change the SSL certificate in the browser and the Burpsuite.
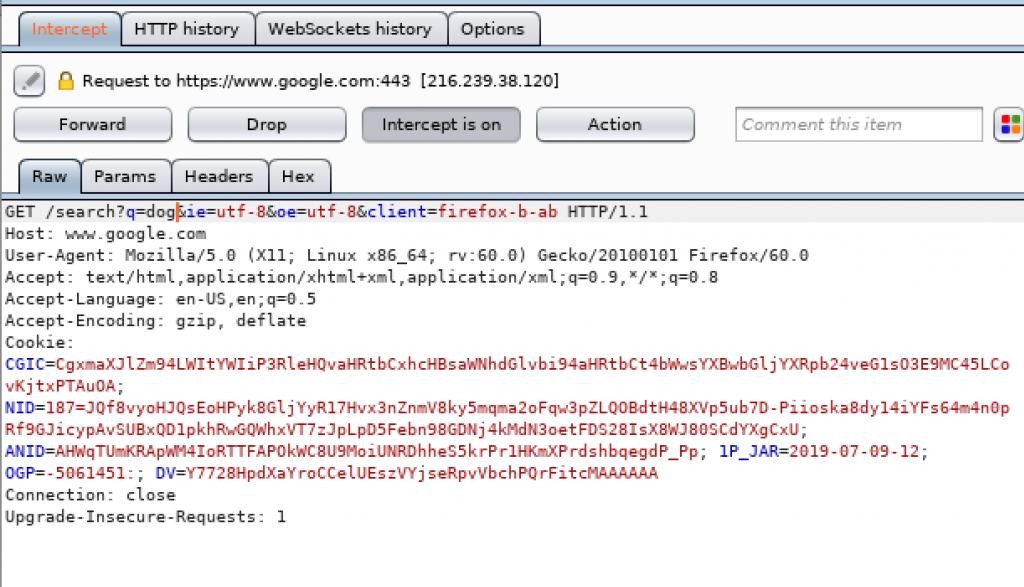
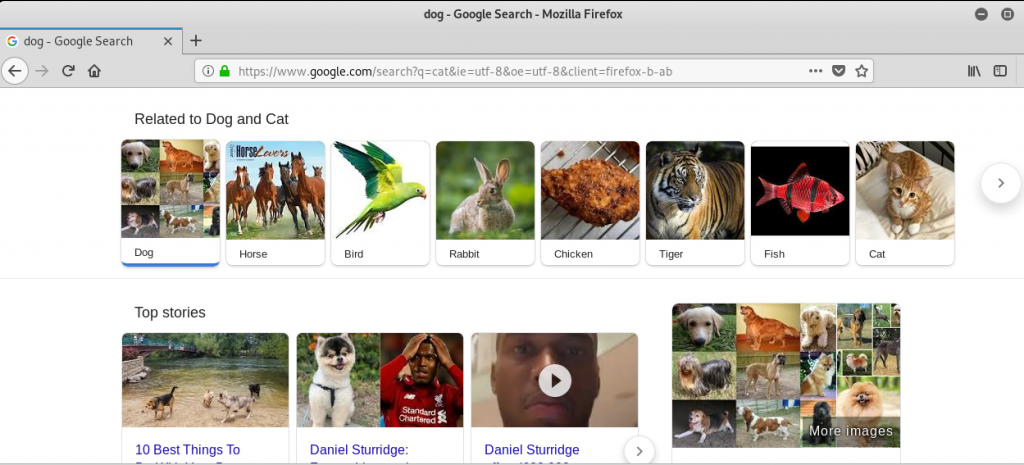
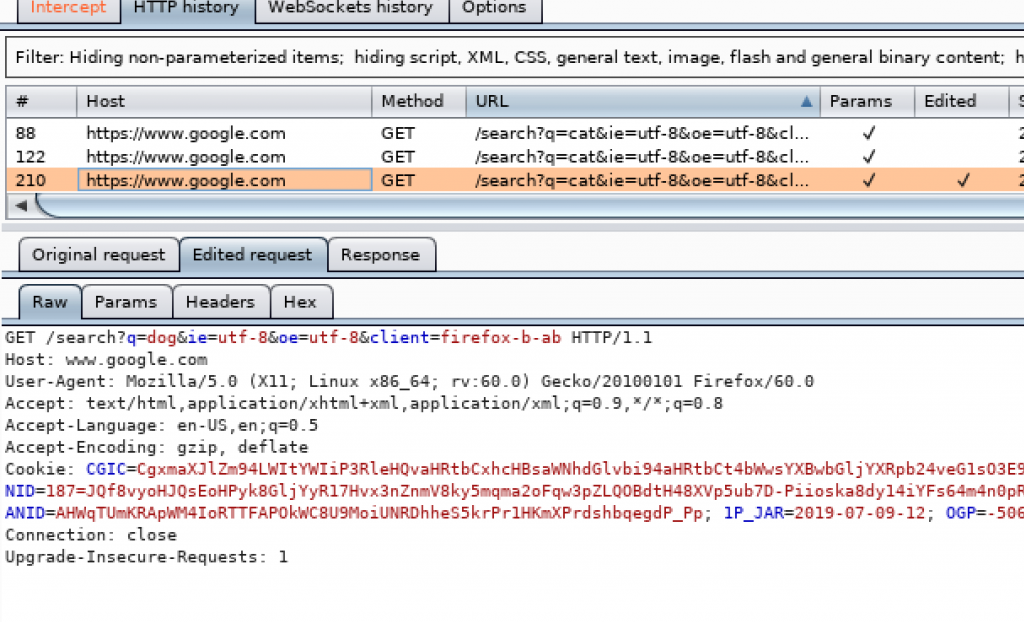
This time I send the request to search for cat again but the request is altered when intercepted before sending it. I changed cat into dog and then forwarded it.
We can also see the history of our intercepted requests by going to the Websocket History tab. Since I intercepted a lot of requests, I have to sort the history based on URL to find the request where I searched for cat.

The history intercepted shows the host, the method of the header, the URL, whether the request was edited or modified, the status code of the response, and the title of the page when we searched for cat.
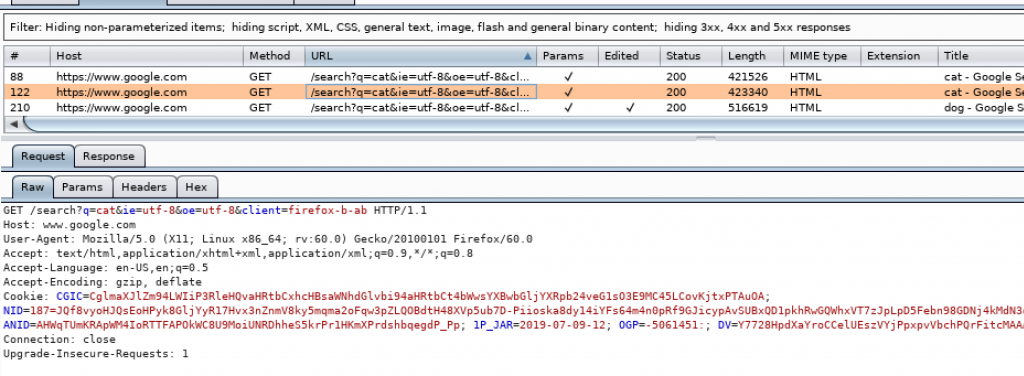
There are the request and the response tab. We can see our request and what the server sent to us as the response. For the request which I edited, it shows the Edited Request tab.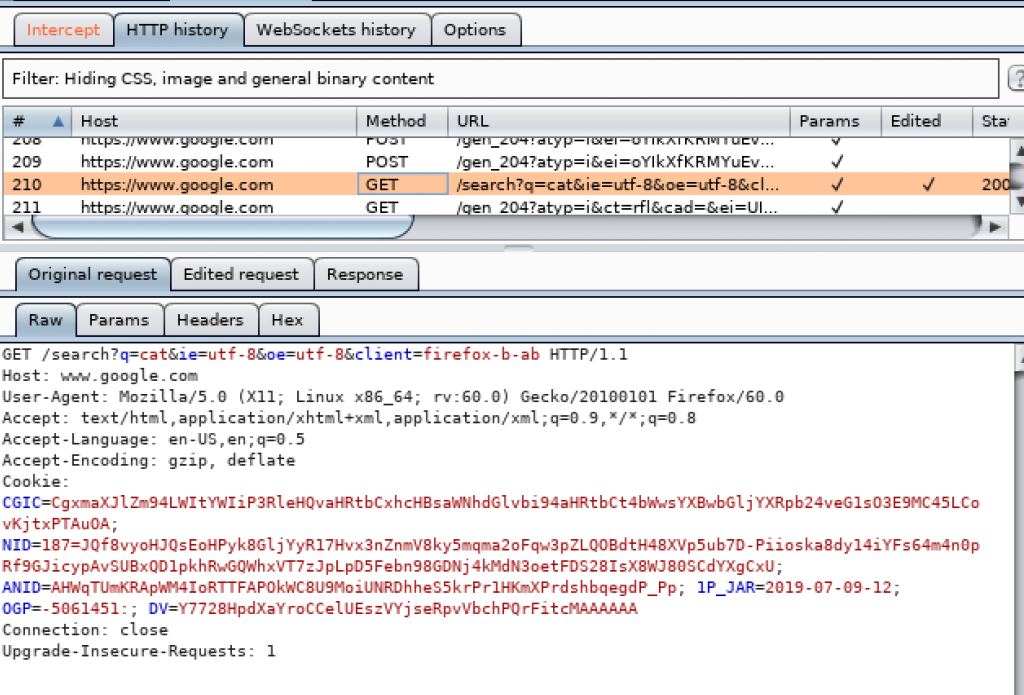
That is one simple way to use Burpsuite.
GEMASTIK 11 Write Up for Kepo Challenge
June 29th, 2019
Reminder: This is for educational purposes only, it is not for criminal act or illegal activities.
My friends and I, a group of three, registered for the national competition for the Cybersecurity section with CTF format which means we need to obtain a piece of data known as “flag” in order to validate the challenge and earn points. We got one case or challenge named “Kepo” which means busybody. The case story tells about someone tried sniffing the packets of his friend’s computer in order to get password for logging in a website, however he got nothing. We had to find the password stored and use it to validate the challenge and get the flag.
First, we downloaded a file named kepo.pcapng and opened it using Wireshark.
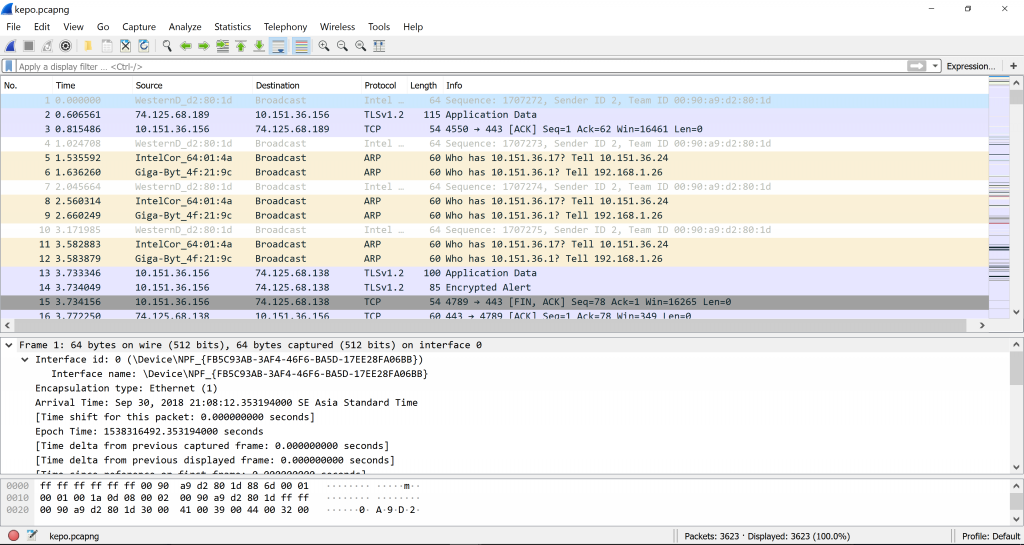
We followed the TCP stream and looked at different streams to find any clues.
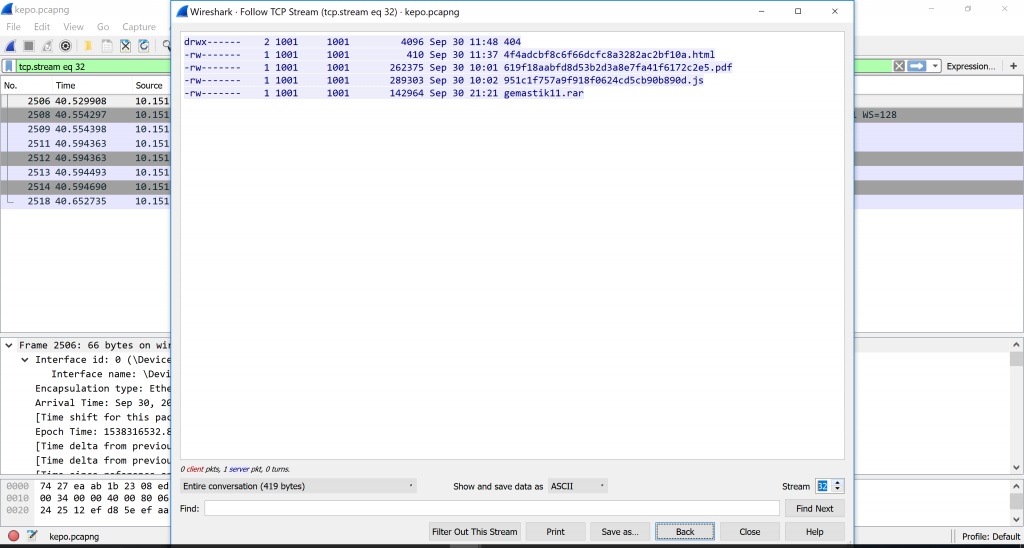
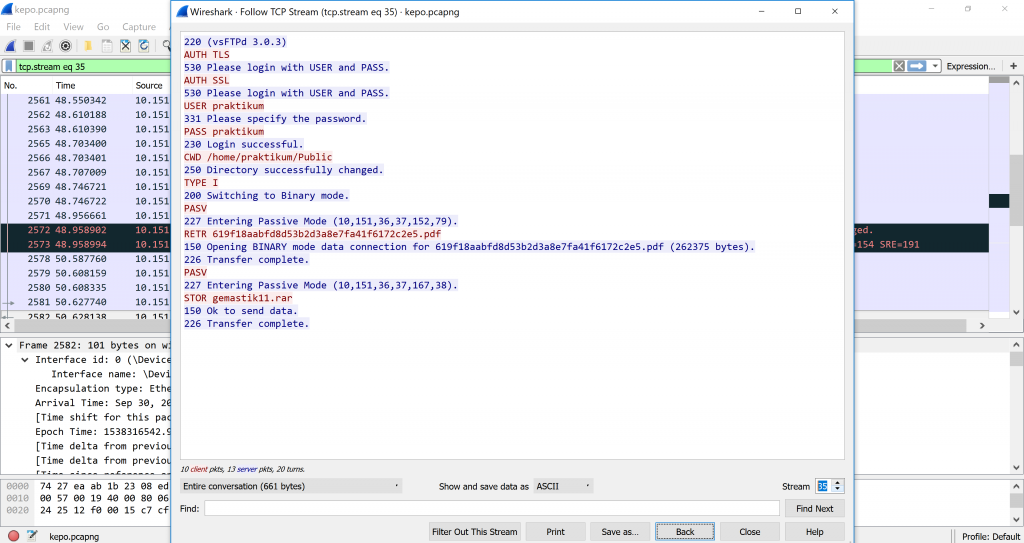
We knew we found the correct clue and the that clue was a compressed folder named gemastik11.rar. Apparently the target makes a STOR request which means he sent data to the server for it to be read and stored in a new file created by the server or replacing a file with the same name. The code 150 means the server accepts the request and code 226 means the storing is complete without any interruptions.
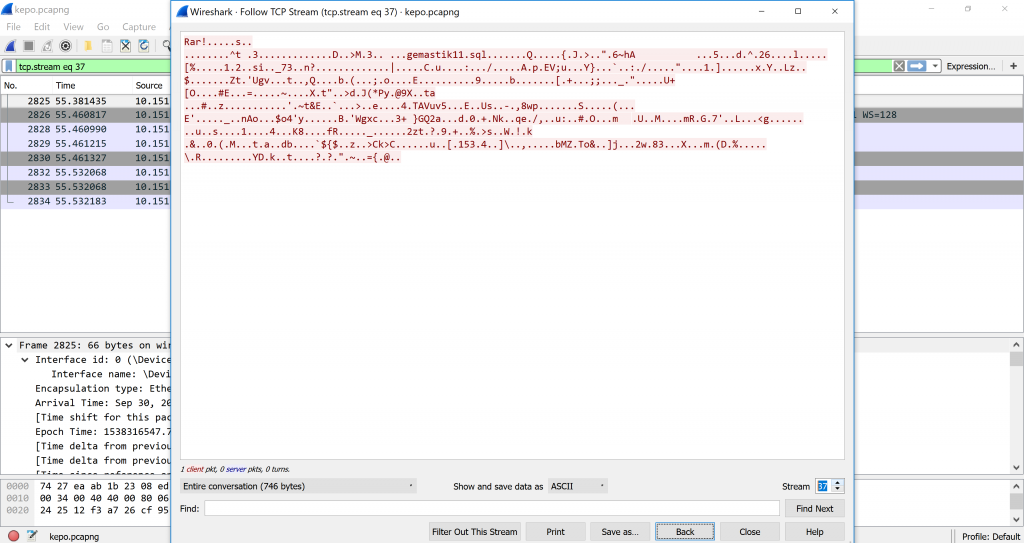
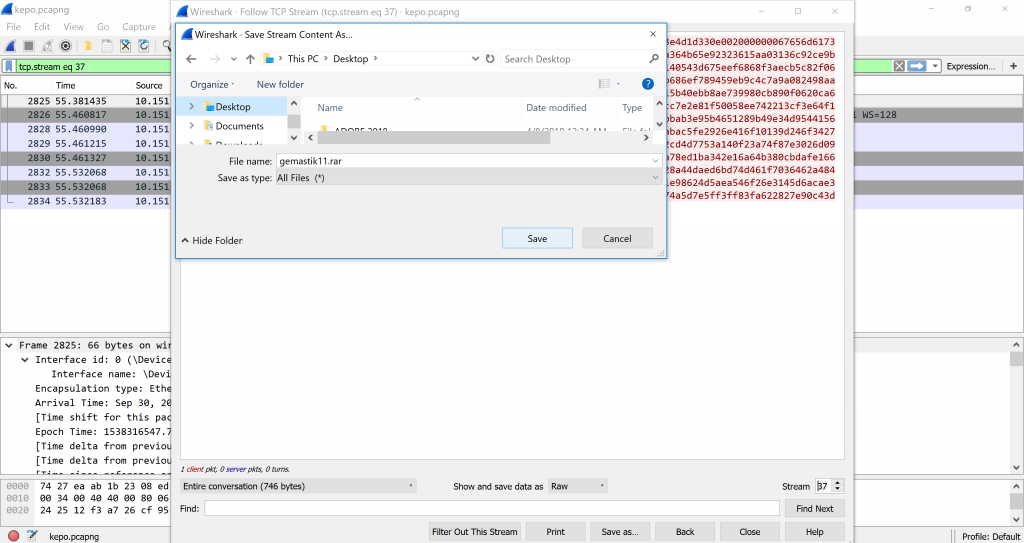
We looked at the next streams and found the stream 37 begins with Rar! and gemastik11.sql in the middle of the second line. It is gemastik11.rar packets.
 We are beginning to extract the data. First change the dropdown next to the “Show and save data as” from ASCII into Raw.
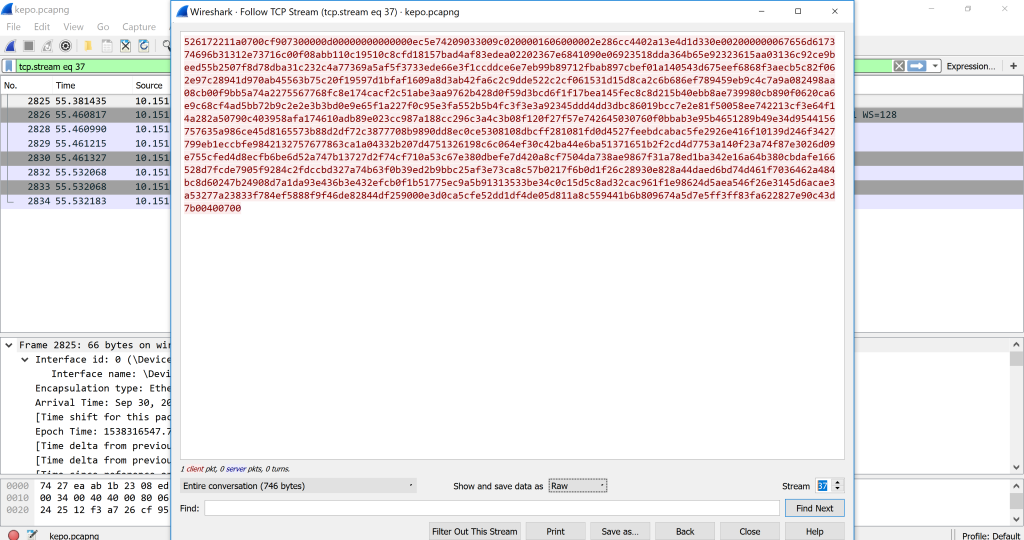
Then we save it as a file named gemastik11.rar.
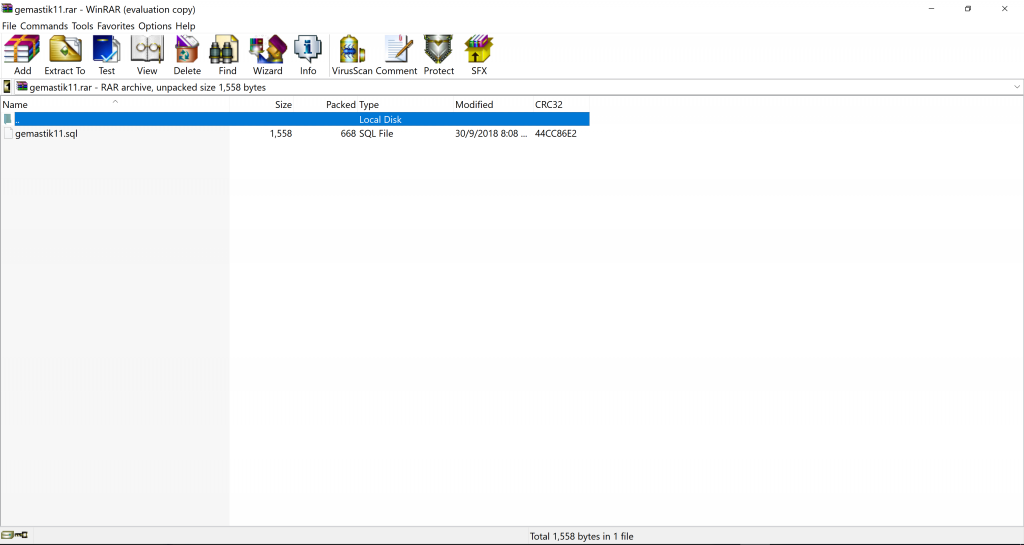
We opened the folder and found gemastik11.sql.
We opened it and found database information.
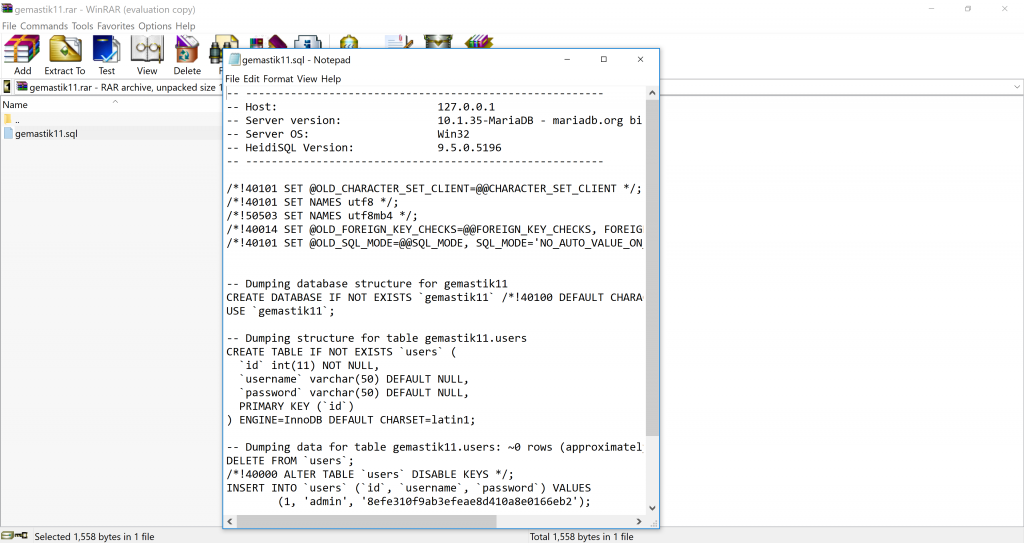
The table containing users has information of the users and the password. We highlighted the information in blue. 
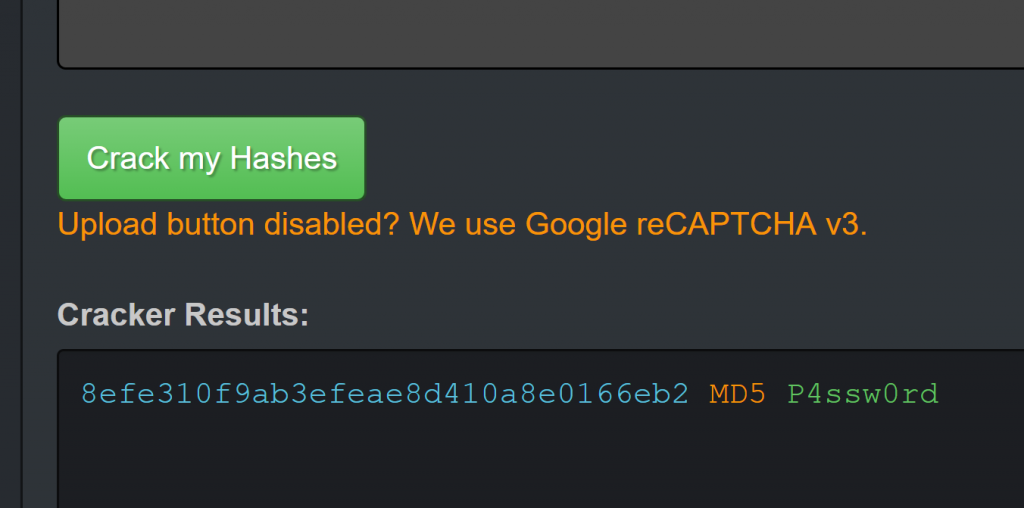
The username admin and the hashed password 8efe310f9ab3efeae8d410a8e0166eb2. The password has 32 characters, we guessed it might be in the form of MD5 hash. So we went to the online hash cracking tool called HashKiller. The link to this online tool is hashkiller.co.uk.
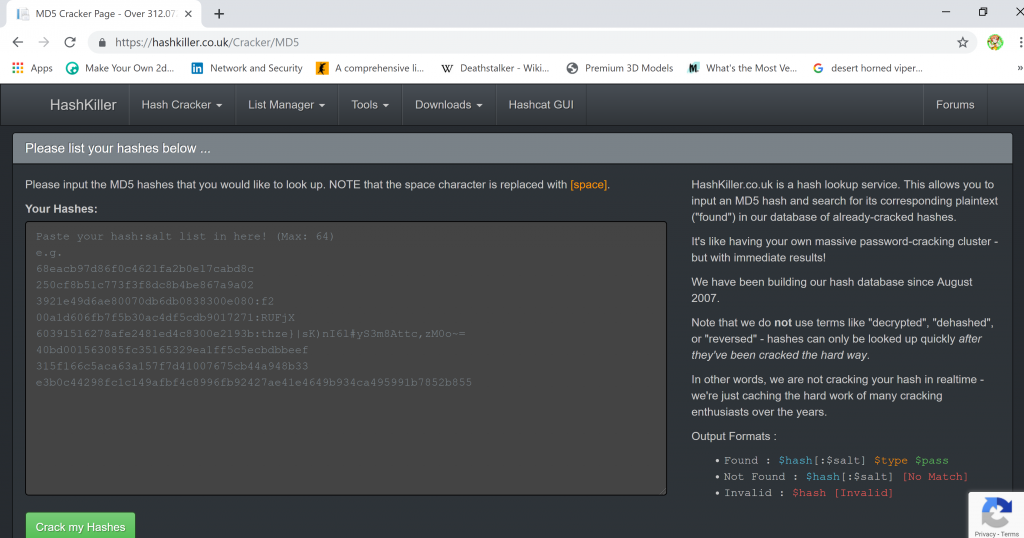
We cracked it and found the password is P4ssw0rd.
We were given the IP address of the machine and the port to connect to. For example, the IP address is 168.192.164.34 and the port is 1234 (We cannot remember the exact numbers so these are fake numbers). We were not given the path to the login page so we guessed with the most common one such as login.php. In the search bar we input 168.192.164.34:1234/login.php and was able to connect and see the login page. We entered the username admin and the password P4ssw0rd and obtained the flag showed on the page in the form GEMASTIK{ }.
I cannot show the screen capture as I had not taken the screen capture of it during the competition.
References:
Bernstein, D.J. (n.d). The STOR, APPE, STOU, ALLO, MKD, RMD, DELE, RNFR, and RNTO verbs.
Retrieved June 28, 2019 from: https://cr.yp.to/ftp/stor.html
Using Wireshark to Capture Local Traffic
June 29th, 2019
Reminder: This is for educational purposes only, it is not meant for any criminal act or illegal activity.
Wireshark is a packet sniffing tool which sniffs packets sent in the network traffic. With this tool, we can see where the packets are going and where they come from, do man in the middle attack, see open ports, and extract unencrypted data and sensitive information. Wireshark is already installed in the Kali Linux.
To use Wireshark, first open Wireshark. There will be the screen as shown below.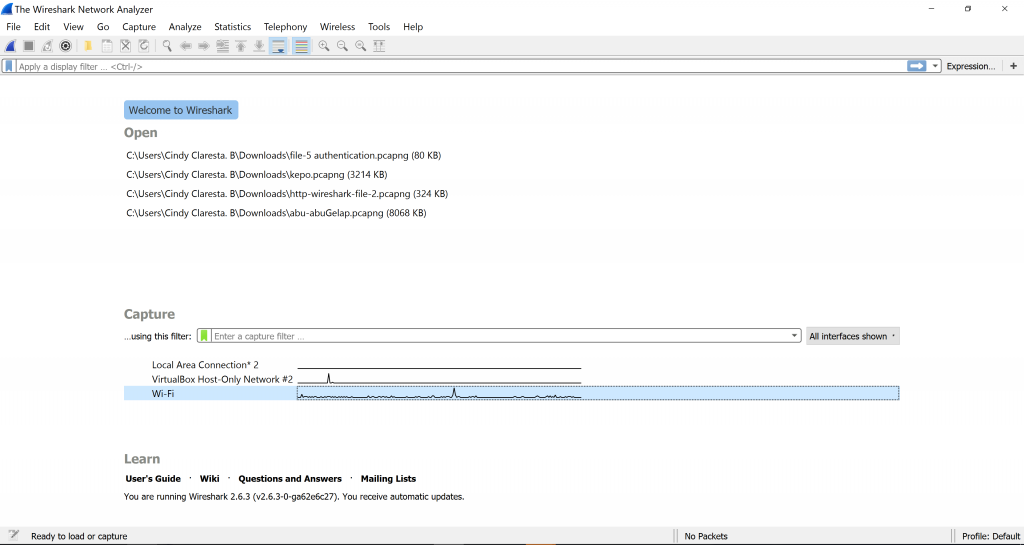
Choose the Wi-Fi connection with up and down line. It will capture the traffic.
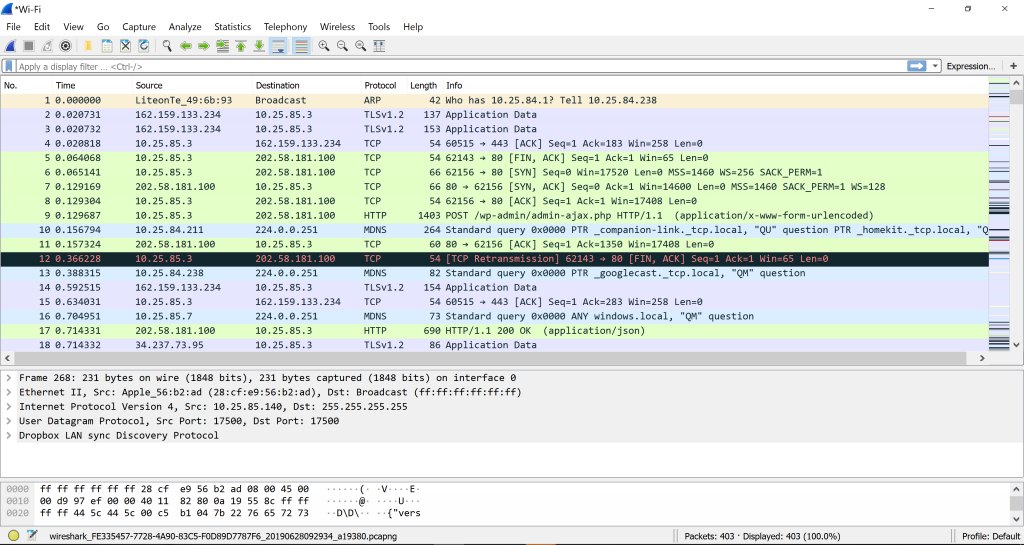
The traffic captured is shown in frames. In order to filter the messy frames and traffic, you can enter string into the empty bar with the words “Apply a display filter.” I search for frames containing HTTP protocol by entering http into the filter bar.
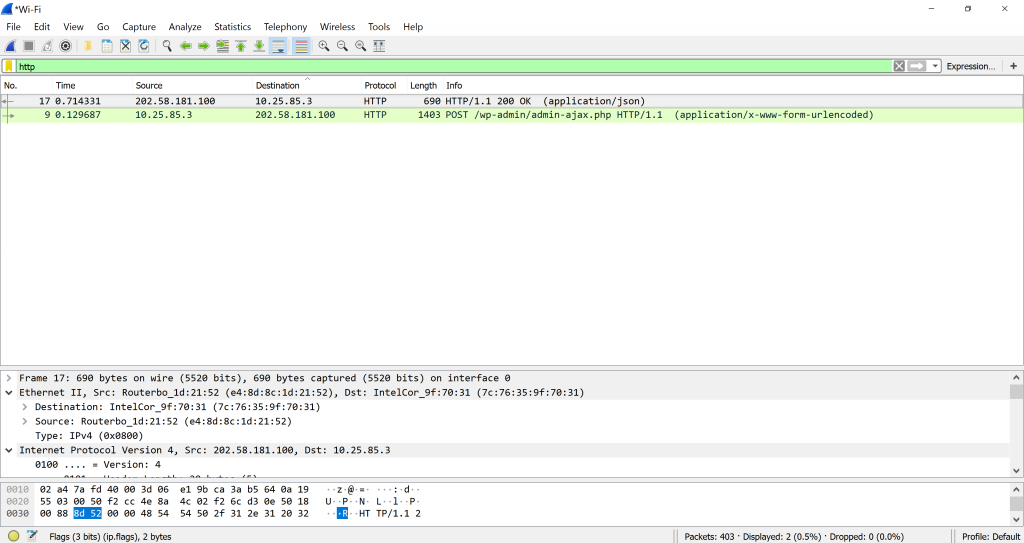
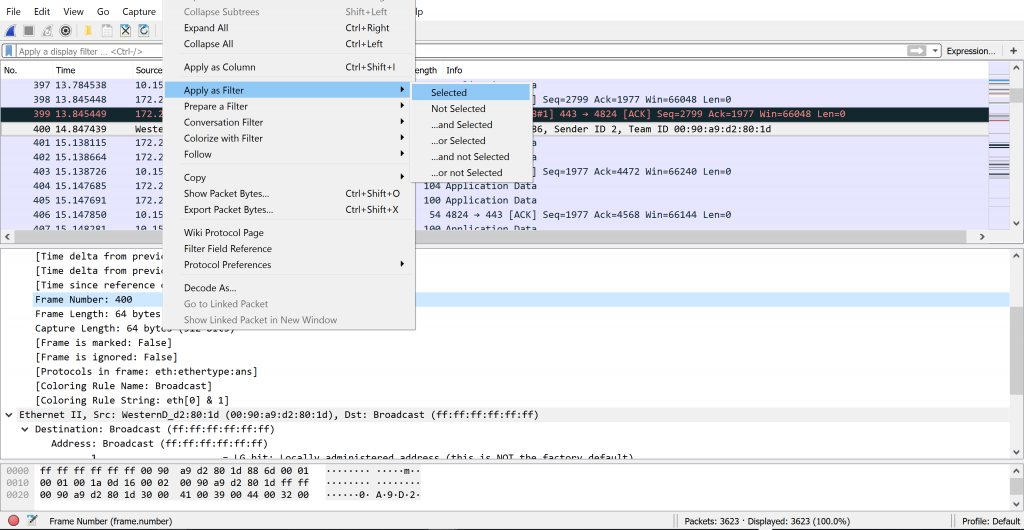
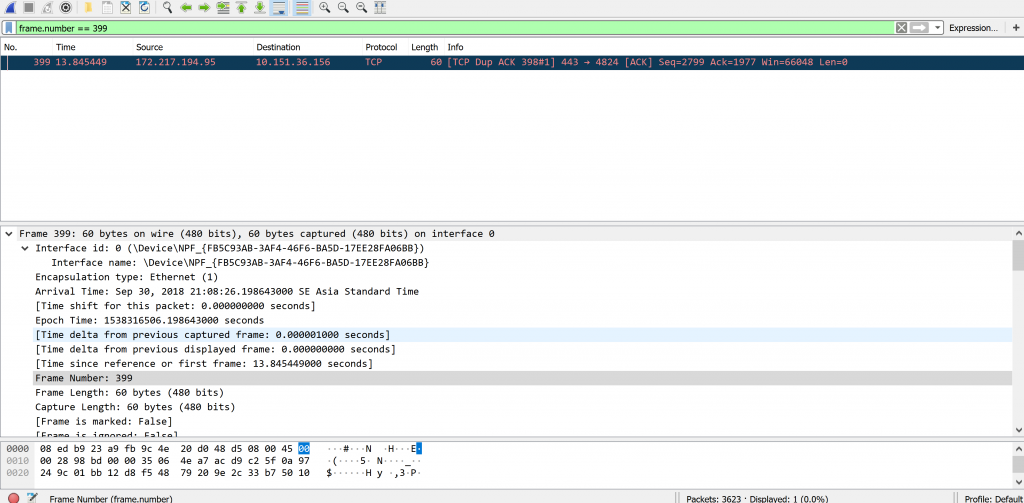
We can also filter by source or destination, the frame colour, the frame number, and other variables. Do right click on the items in the white box or right click on the items in the coloured frames (if you click on the frame number, the frame number will be filtered) and then click on apply filter to either select and display it or not select it to display everything but not the one you clicked on.
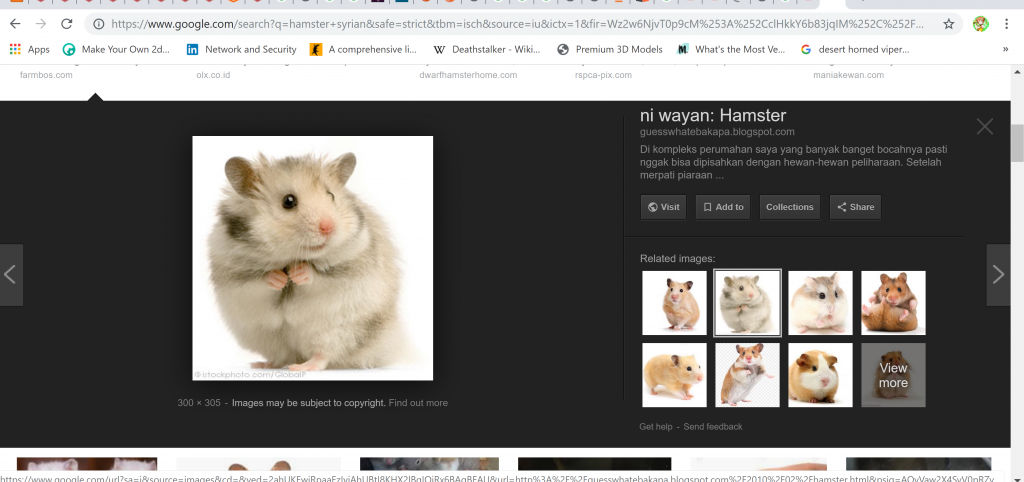
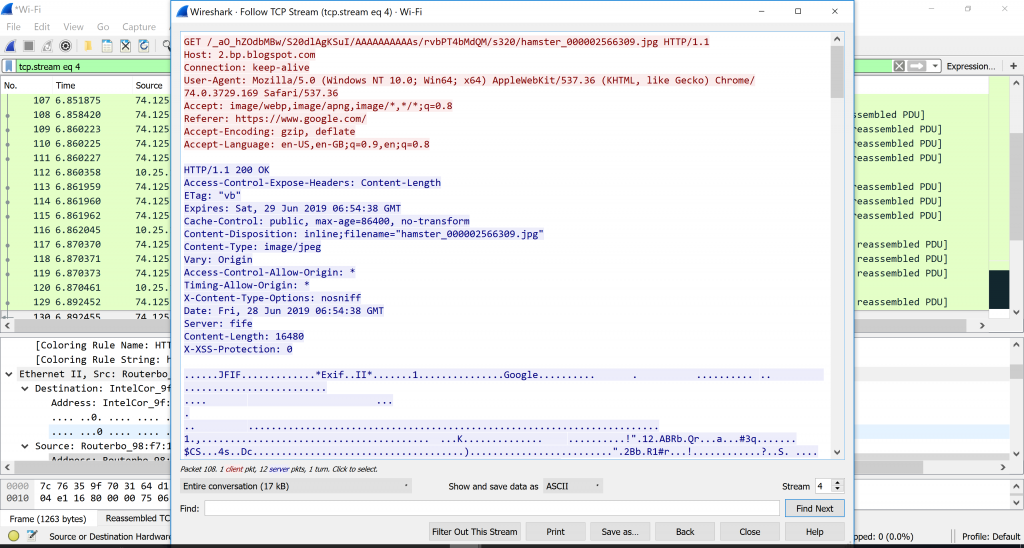
You can also see the activity or the file that is downloaded, for example I downloaded a picture of hamster from Google.
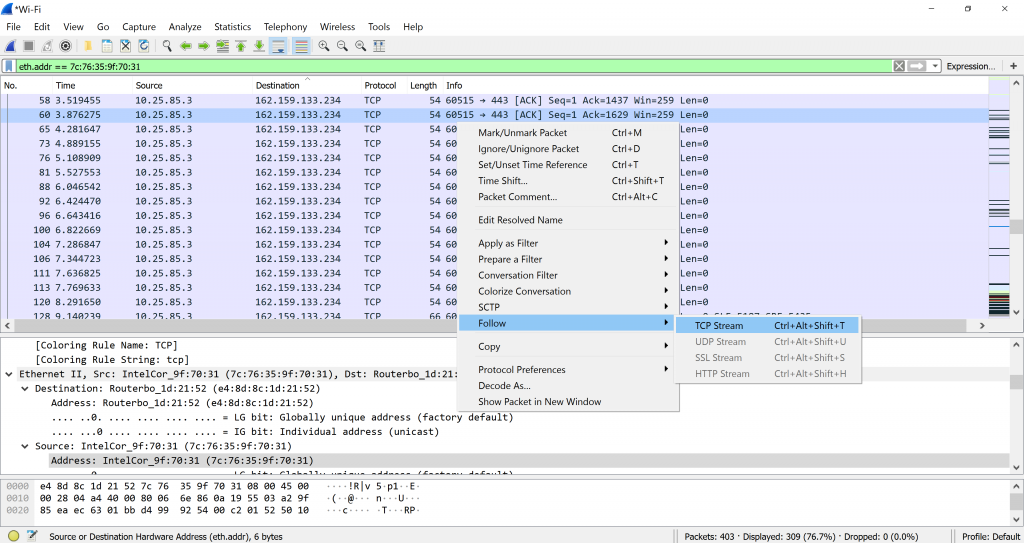
In Wireshark, we can follow the TCP stream to see the whole process of sending and receiving of the data. Usually it will immediately filter to the number of the TCP stream out of many streams. We can look around by clicking the arrow up and down button on the stream to search for the request we sent to the server and receiving an OK status from the server. I got it at the fourth stream.
It is not difficult to use Wireshark right? 🙂
Using Wpscan to Bruteforce WordPress Login Page
June 29th, 2019
Reminder: This is for educational purposes only, it is not for any criminal act or illegal activities.
Wpscan tool is a tool to scan a WordPress blog. It is used for enumerating user, plugins, themes, and even bruteforce passwords from a word list. It is already installed in Kali Linux.
First, you need to find a target to attack. In this tutorial, I used my own blog to attack.
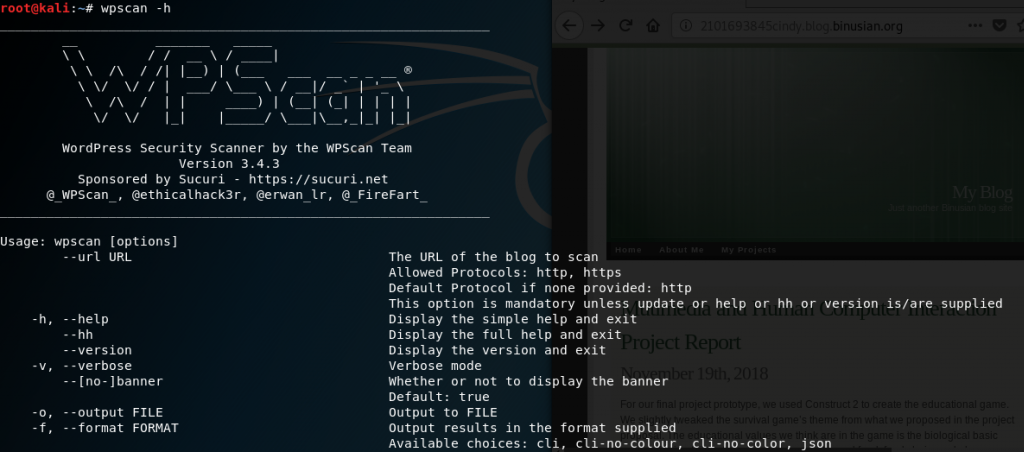
Open Terminal to and type wpscan -h for help and scroll down to look for more commands.
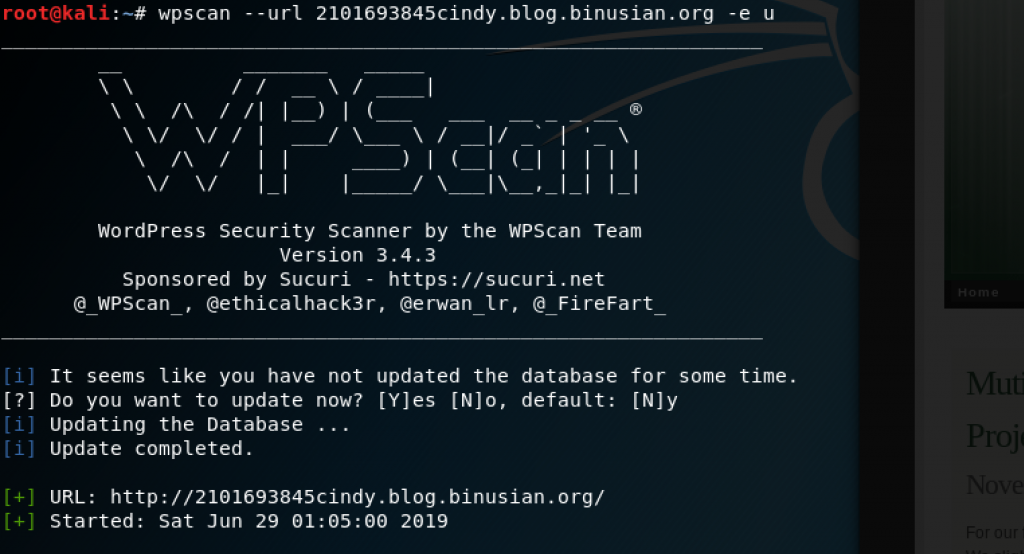
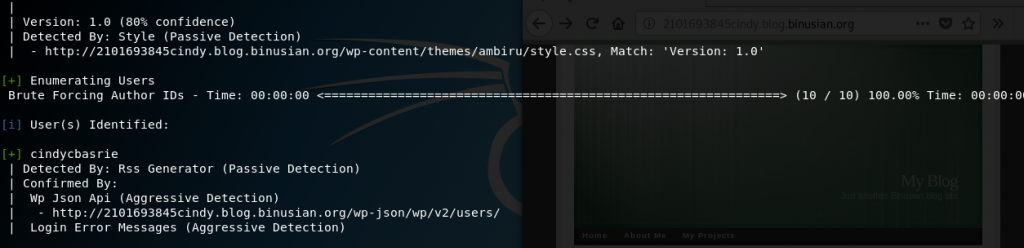
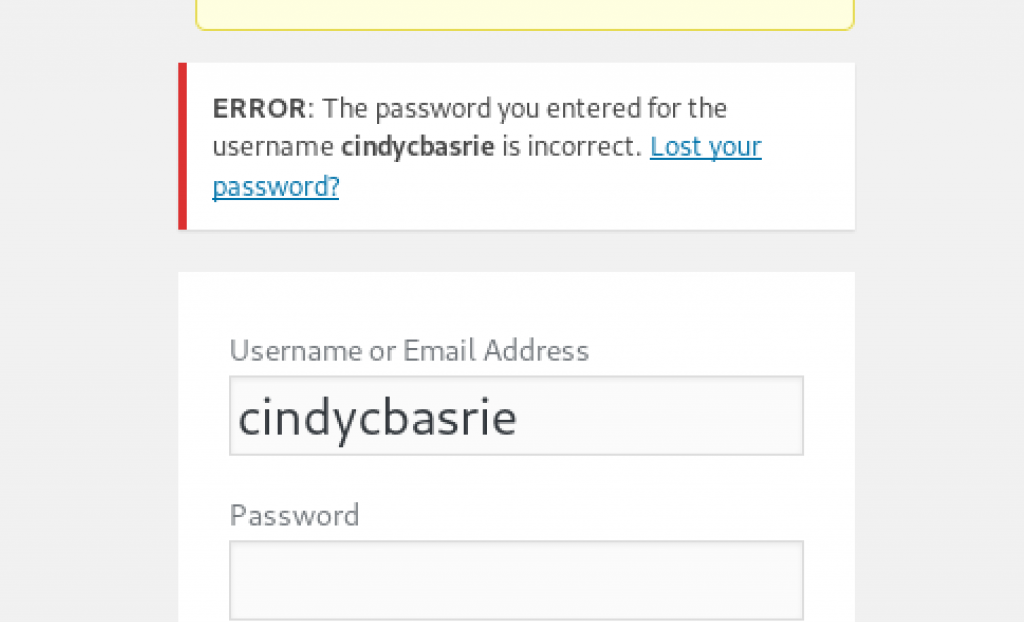
Enumerate the users using the command wpscan –url target.com/target’s ip address -e u. I typed wpscan –url 2101693845cindy.blog.binusian.org -e u and obtained cindycbasrie
Checking the username whether is it correct in the login page 2101693845cindy.blog.binusian.org/wp-login.php.
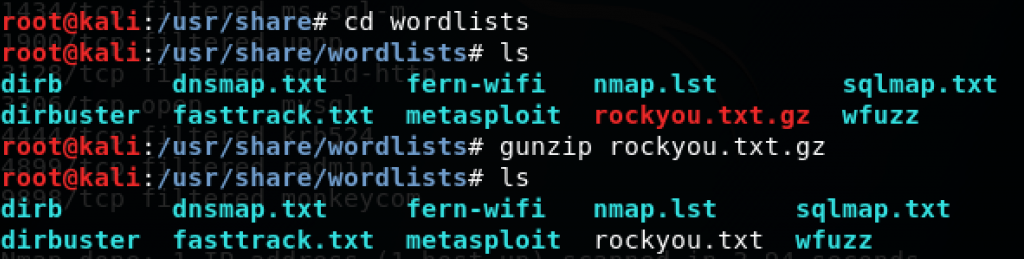
Get password list, for example rockyou.txt which is located in /usr/share/wordlists as rockyou.txt.gz, so you need to decompress the file first. Rockyou.txt contains over 14 million passwords.
However, my wpscan tool killed the bruteforce process using this word list, so I used another word list containing some passwords (I put 5 passwords into the word list I made. I typed wpscan –url 2101693845cindy.blog.binusian.org -U cindycbasrie -P wordlist.txt to begin bruteforce.
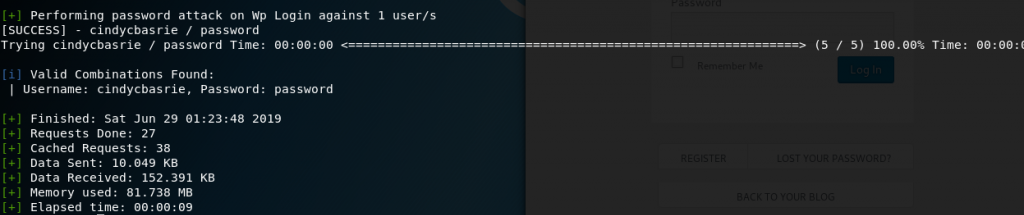
It was a success and showed that the combination of username and password is cindycbasrie and password.
I also changed my password to something that is not in the word list, so do not think of trying to bruteforce my blog 🙂
Installing Kali Linux (2019) for Penetration Testing
June 29th, 2019
Reminder: This is for education purposes only, not for any criminal acts or illegal activities.
Kali Linux is a popular Debian derived Linux operating system for penetration testers. It has many powerful tools specialized in penetration testing of many areas such as Social Engineering, Cryptography, and others. Let us begin the steps to install Kali Linux in virtual machine.
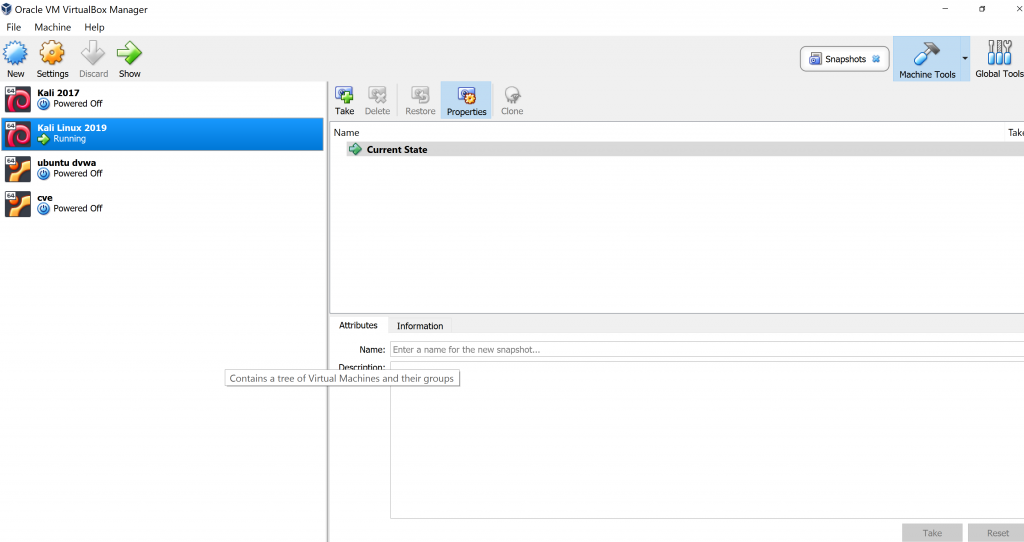
The first step is to download any virtual machine like VMWare or Oracle VM VirtualBox. I have VirtualBox for this tutorial. The link to download Oracle VM VirtualBox is here: https://www.virtualbox.org/. This is what the virtual machine manager looks like when you open it.
The next step is to download Kali Linux operating system. Make sure the file type is “.iso”. Here is the link to download: https://www.kali.org/downloads/
Open the virtual machine and add a new machine. Name it and the operating system type Linux and the version Debian.
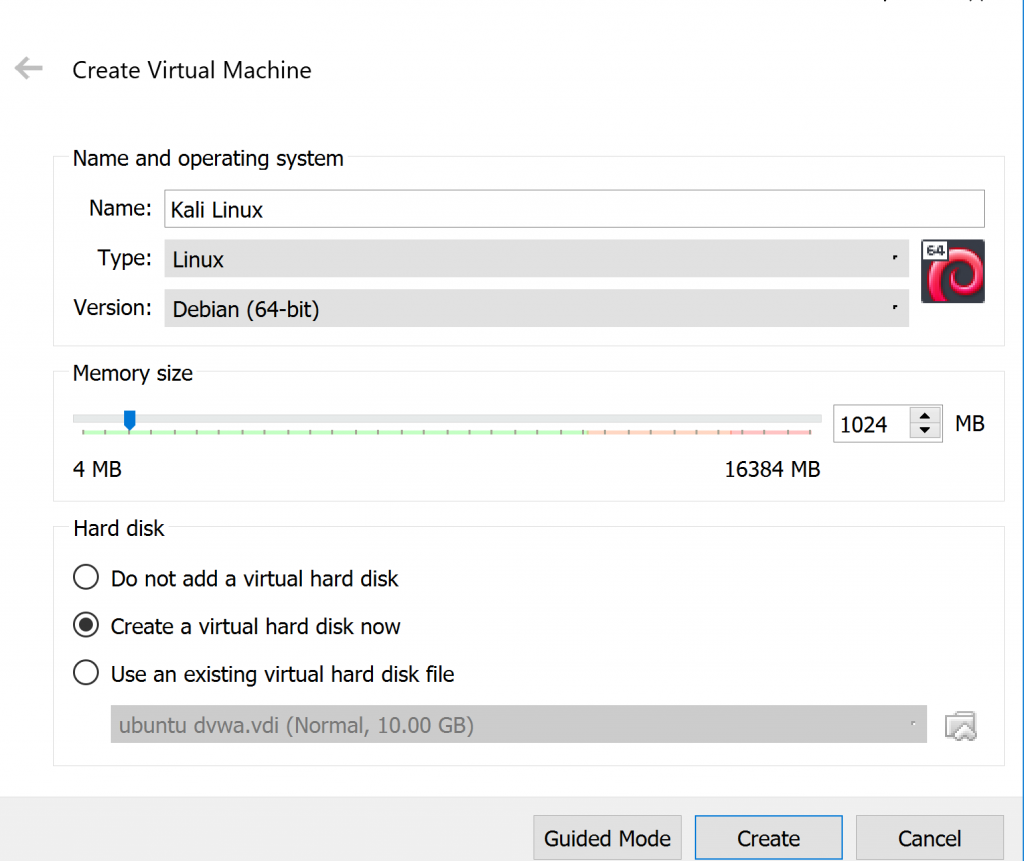
Set the amount of memory for Kali Linux. Preferably the memory is at least 20 GB.
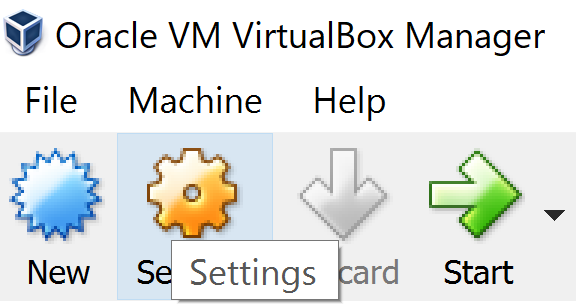
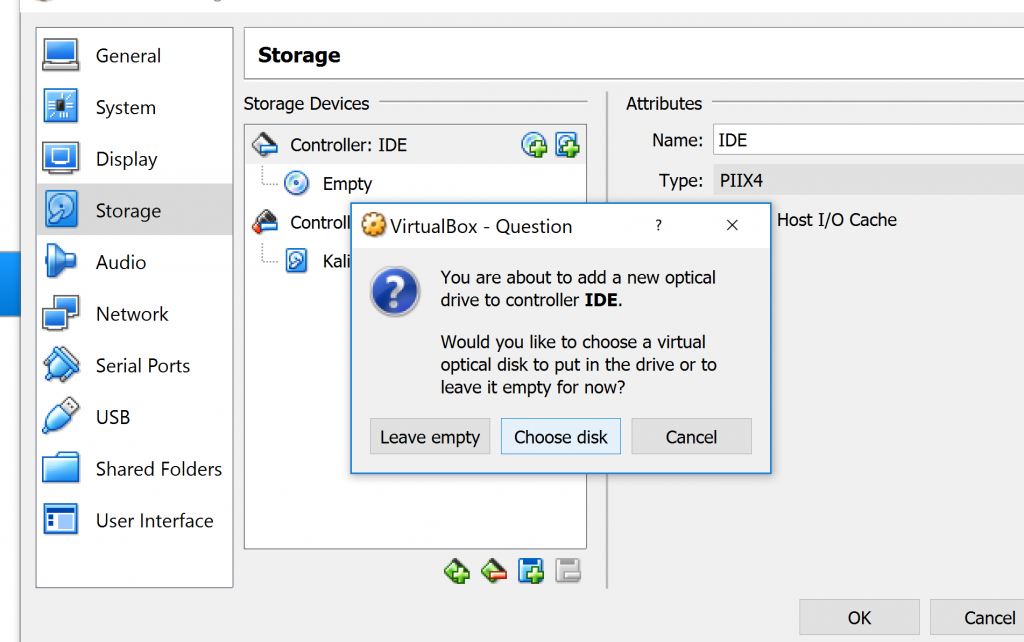
Next step is open Settings and go to the Storage.
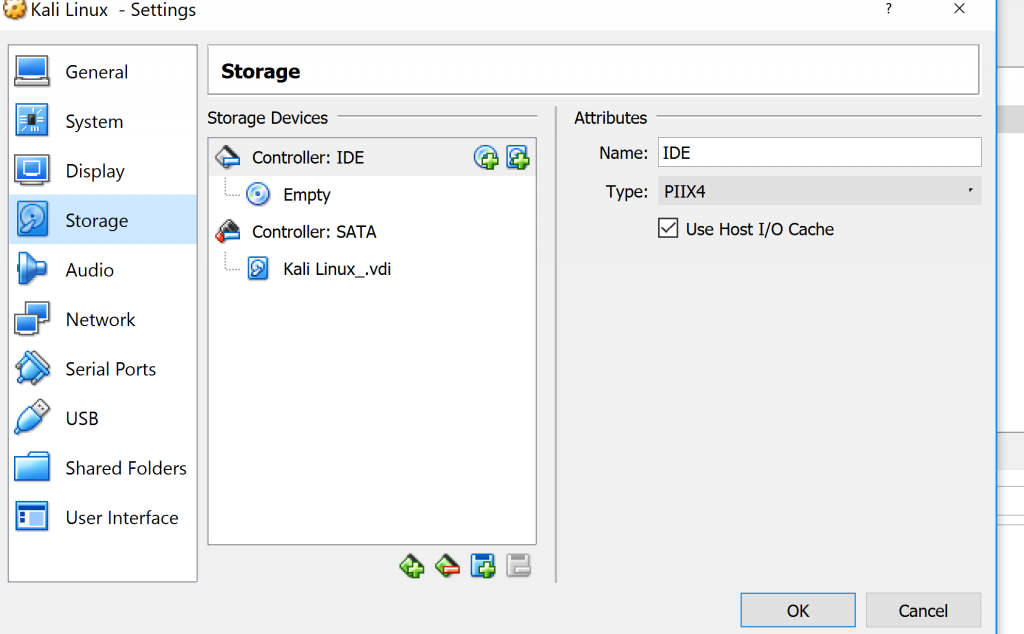
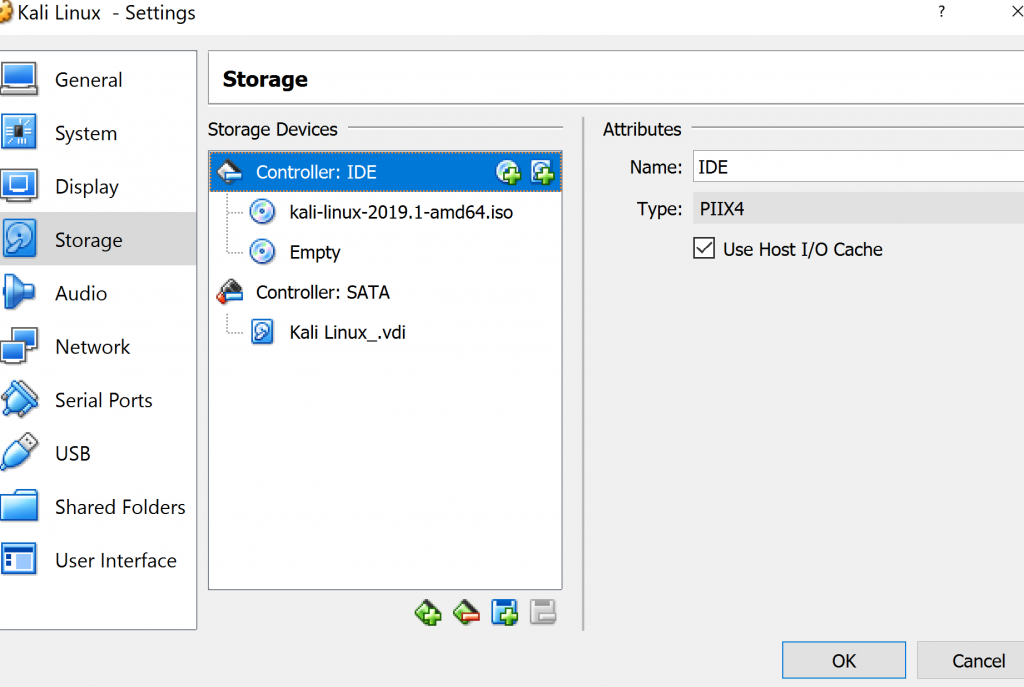
Click on the disc on the right side of Controller: IDE. Click on “choose disk” and then choose from your files the Kali Linux ISO.
Sometimes you will not be able to access the Kali Linux, because your PC do not allow virtualization. It is disabled in the BIOS. To access the BIOS, usually you have to restart your PC and press Delete, F2, or F10 button since it differs from PC to PC. Once you have entered BIOS, enable Virtualization and save the settings.
Once you opened Kali Linux and it works, it will show you the boot screen and choices.
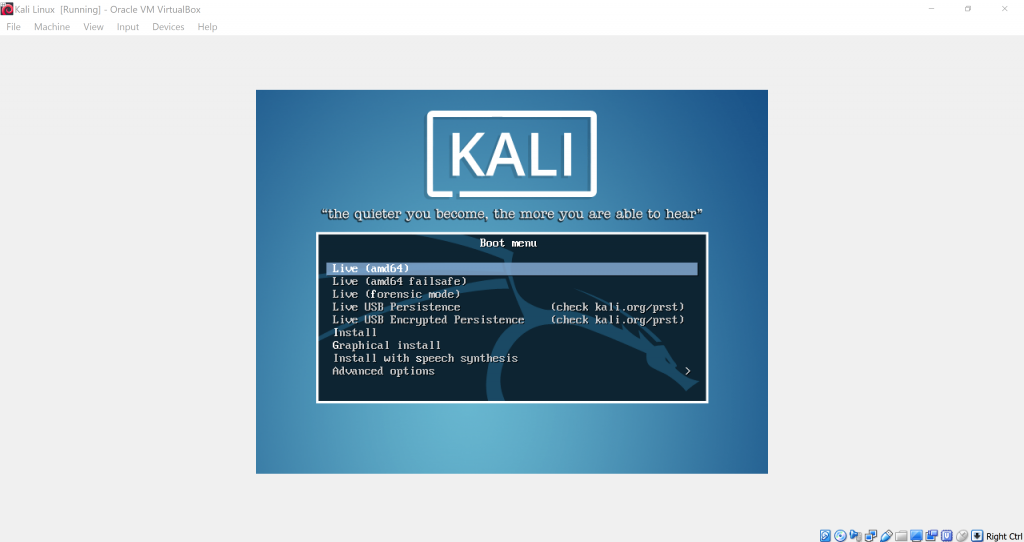
We will be doing Graphical Install. Use the arrow down key to navigate downwards.
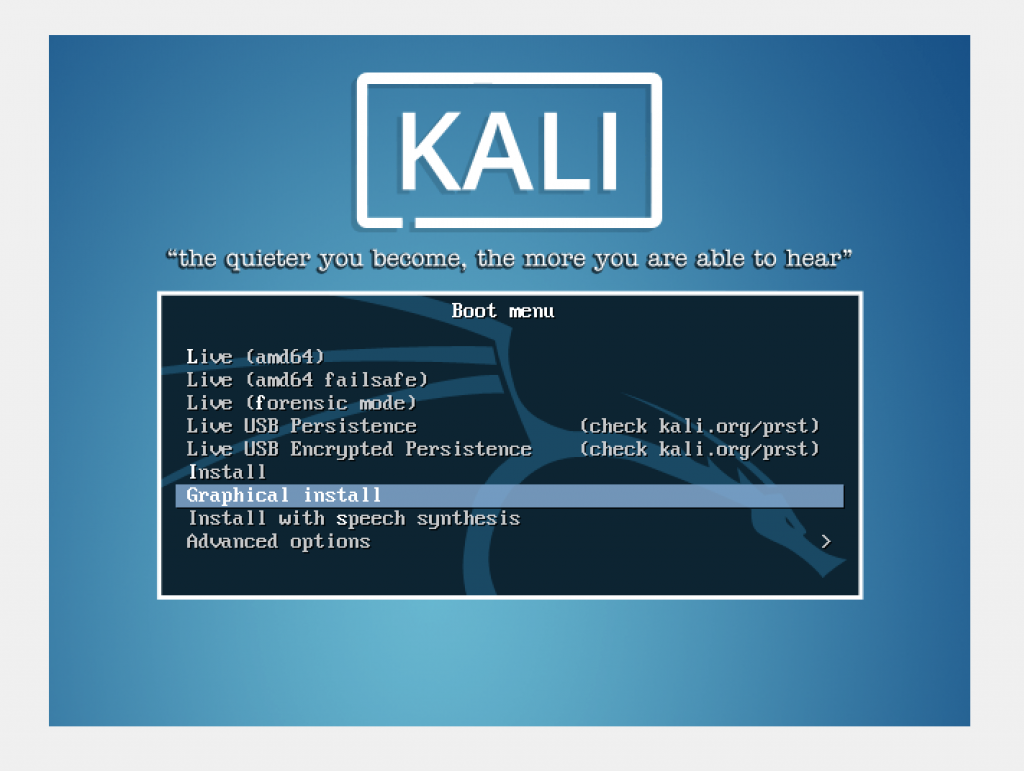
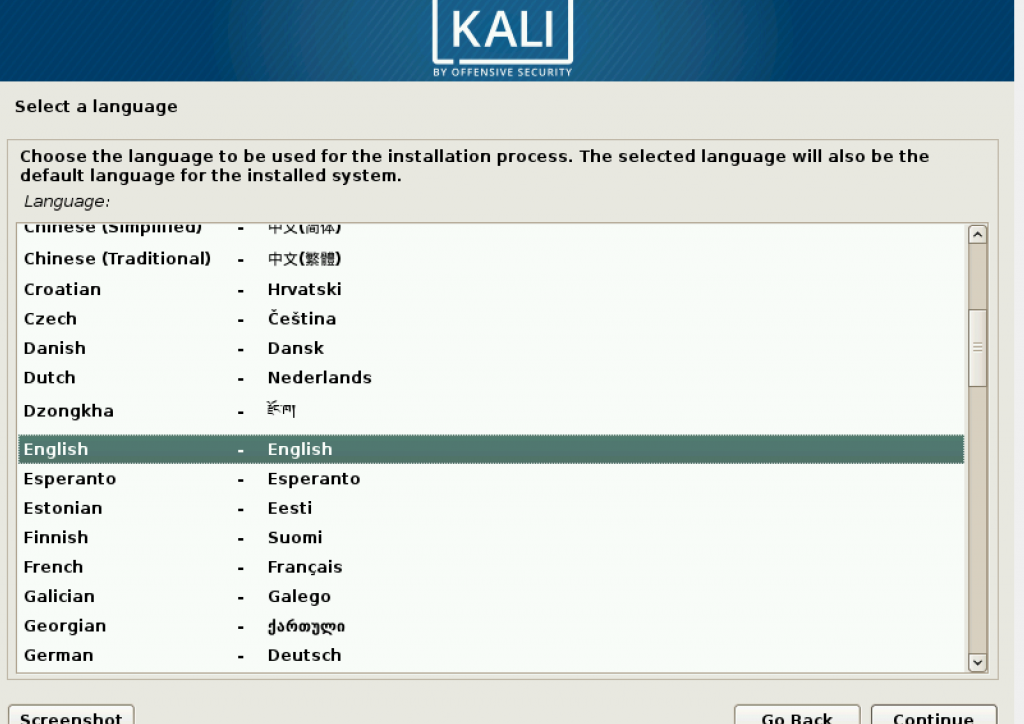
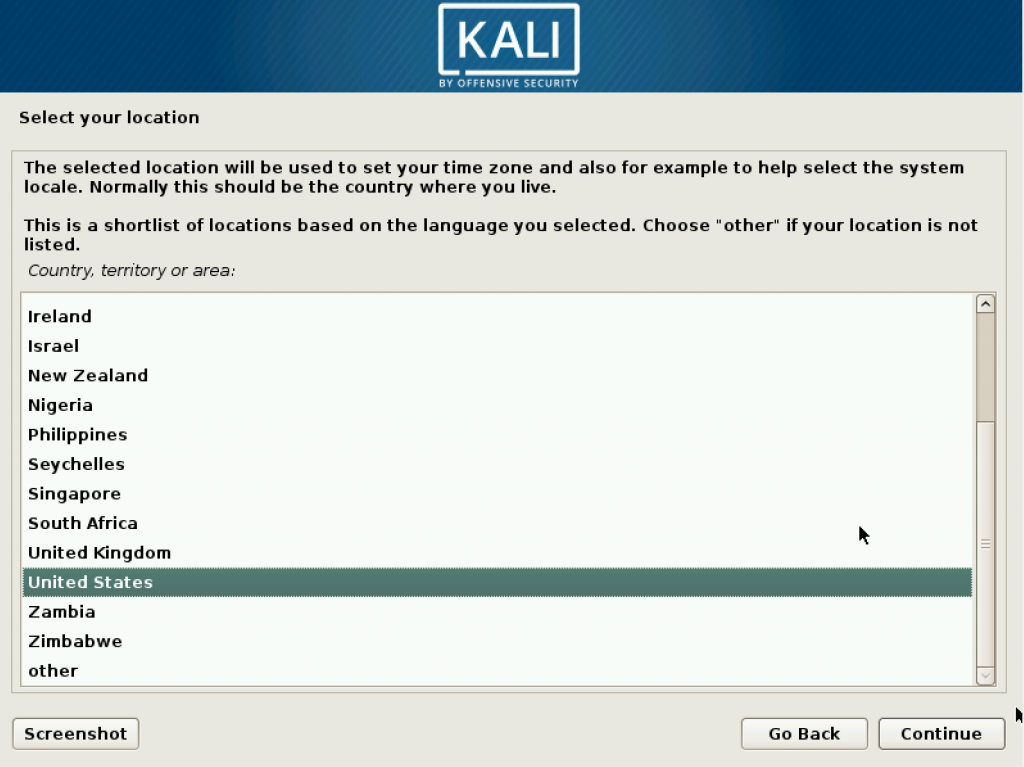
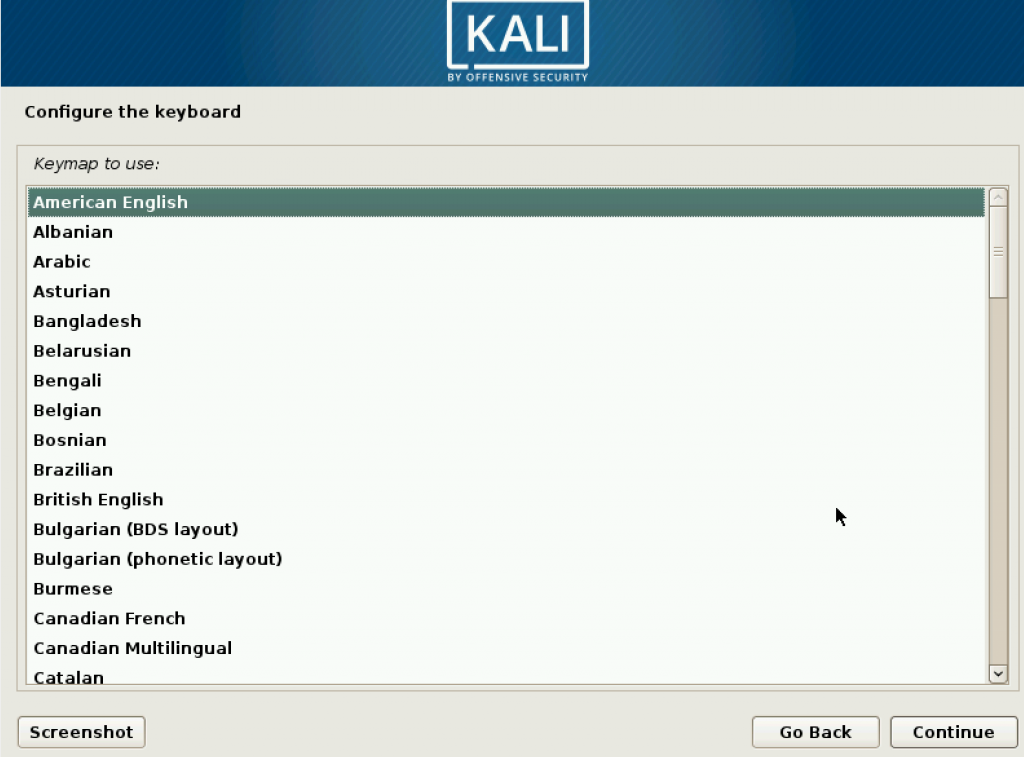
Press on Enter key to begin installing. Then you may choose your language, country region, and keyboard based on your preference.
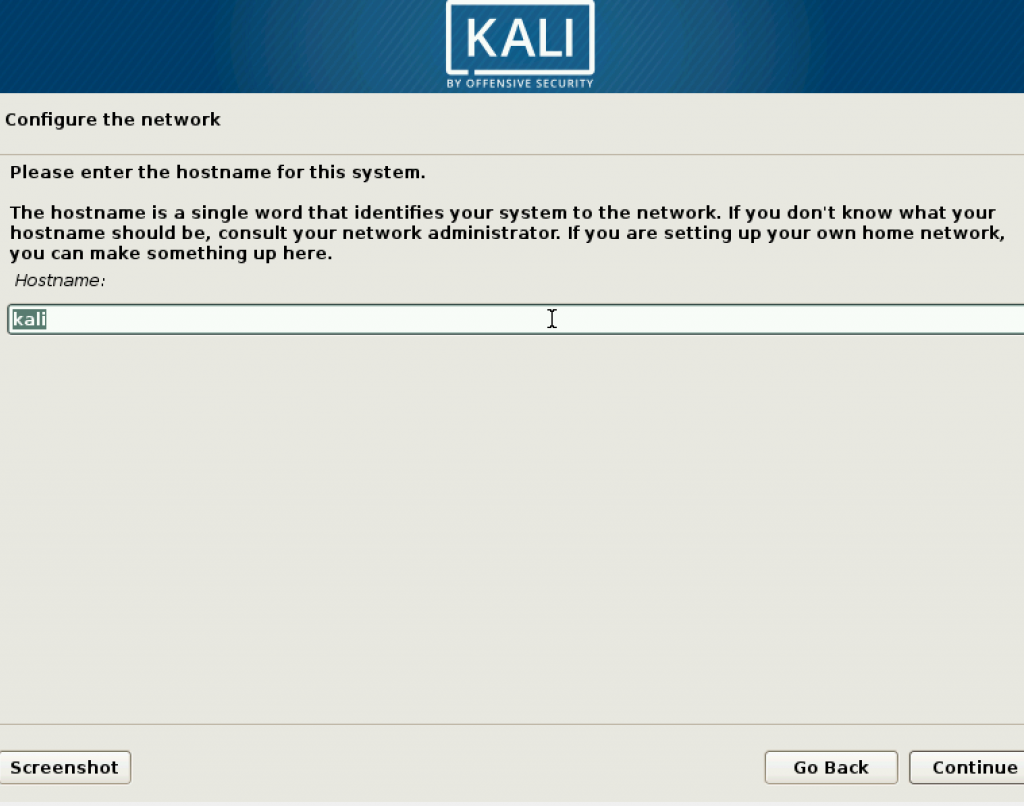
Then we start to configure the account. Set your username.
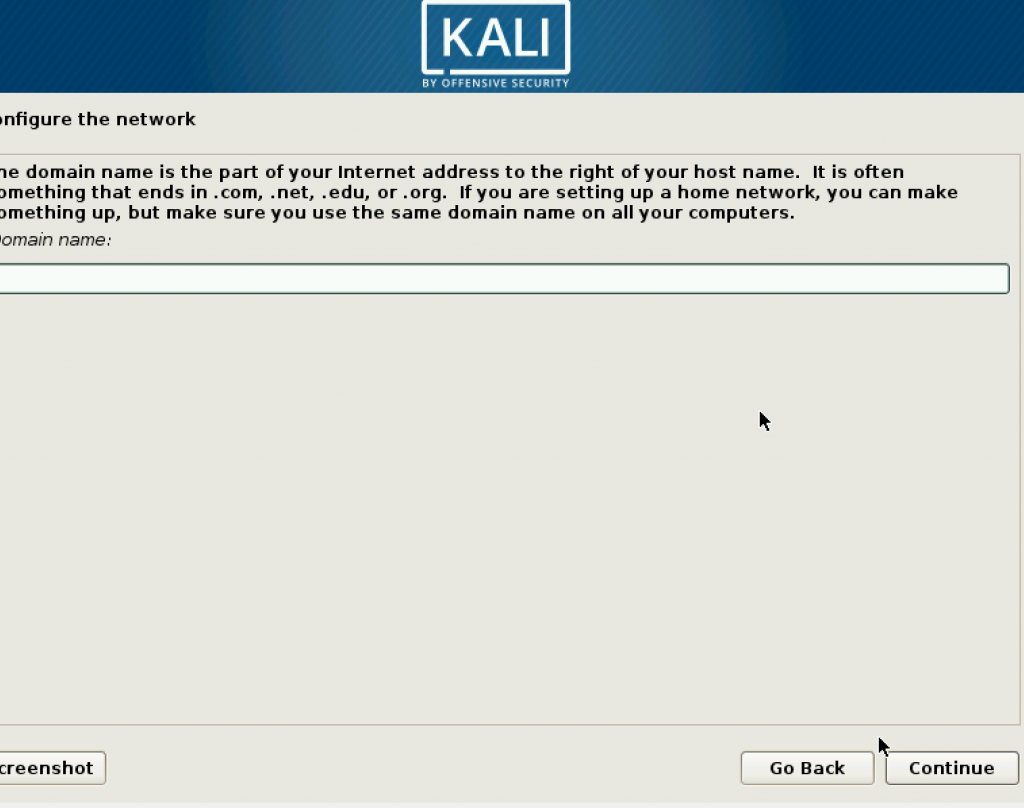
Next step is configure the domain name, but you may leave it blank. and proceed to the next step.
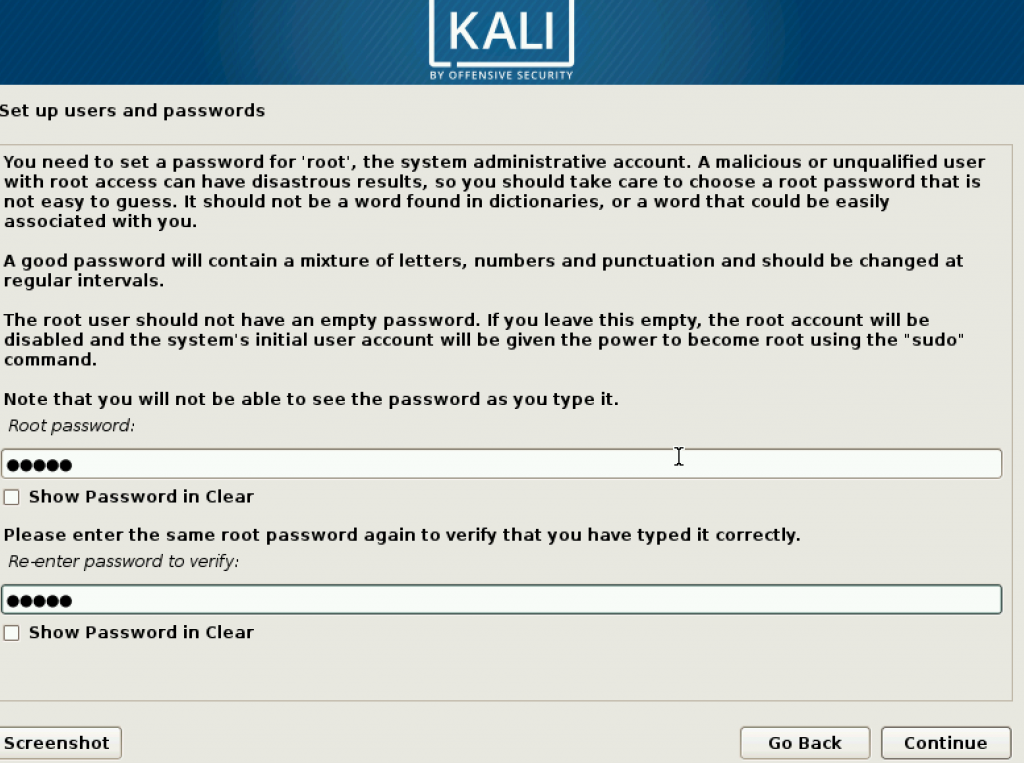
Make strong password for your root.
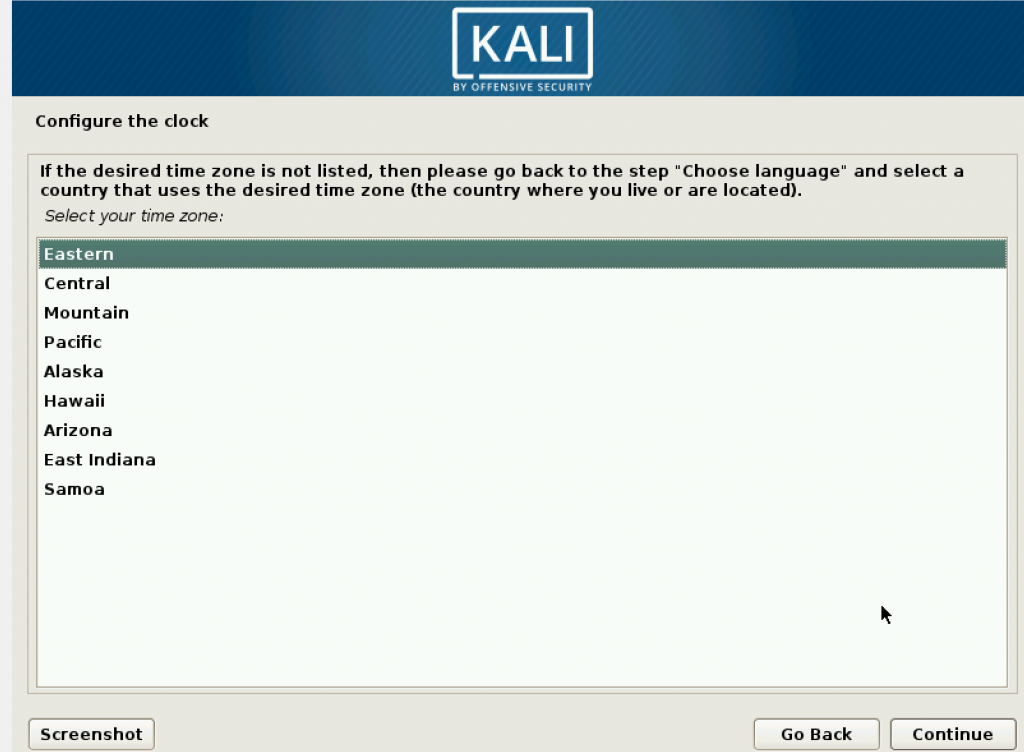
The next step is setting up the time zone for your Kali Linux. This setting can be changed later.
Then setting up partition disk, which uses the memory you provided for the machine. In this step, it is better if you set it as encrypted.
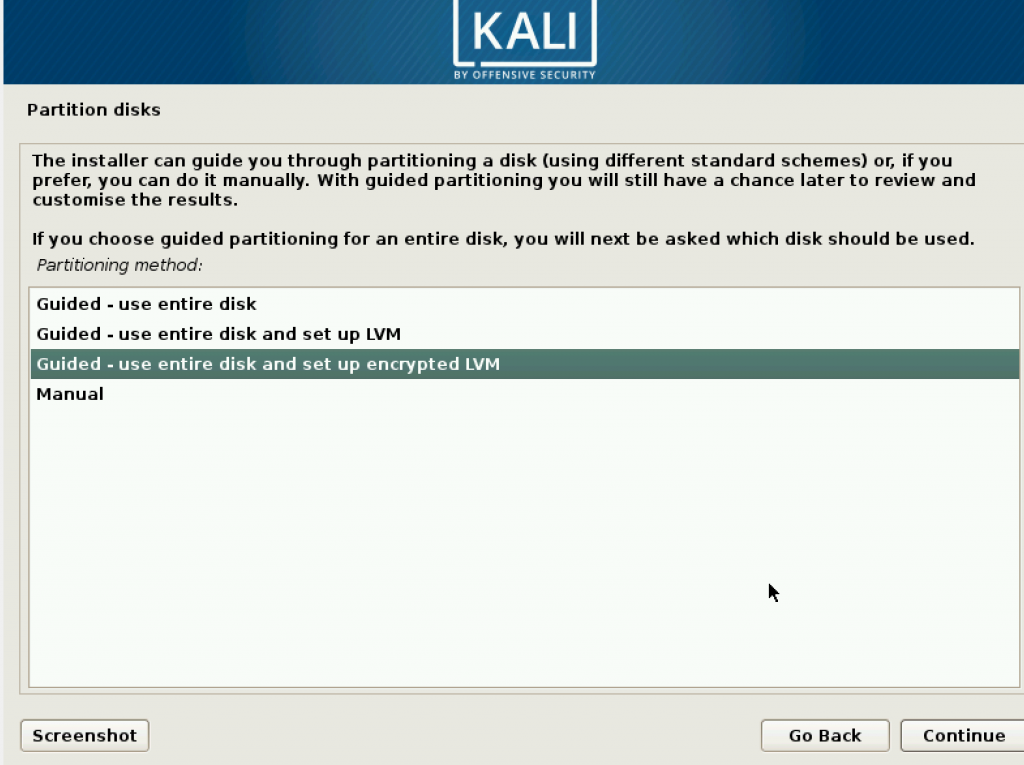
Since there is one choice, choose it and proceed to the next step.
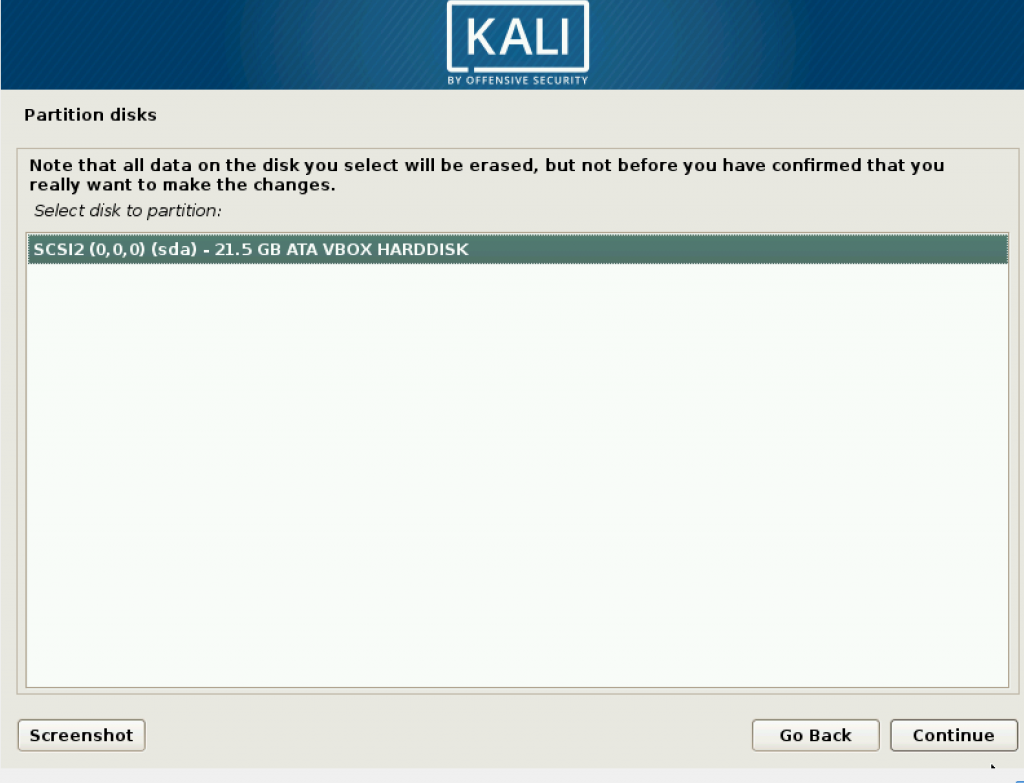
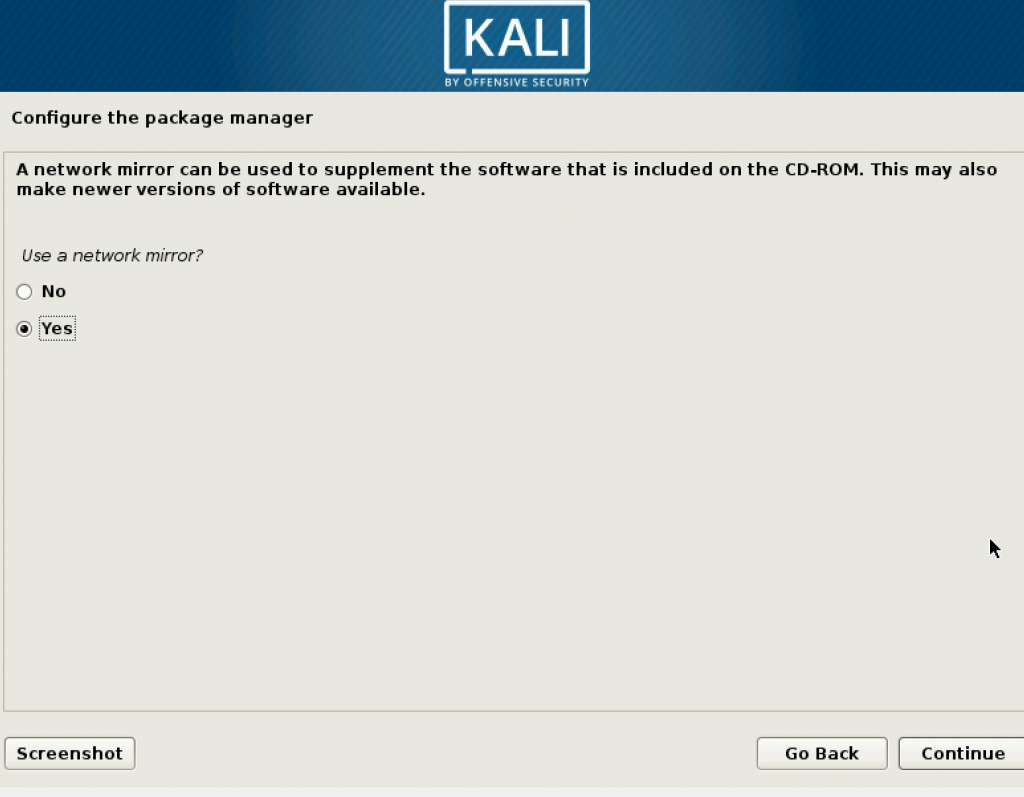
Since you are a new user, choose the recommended setting.

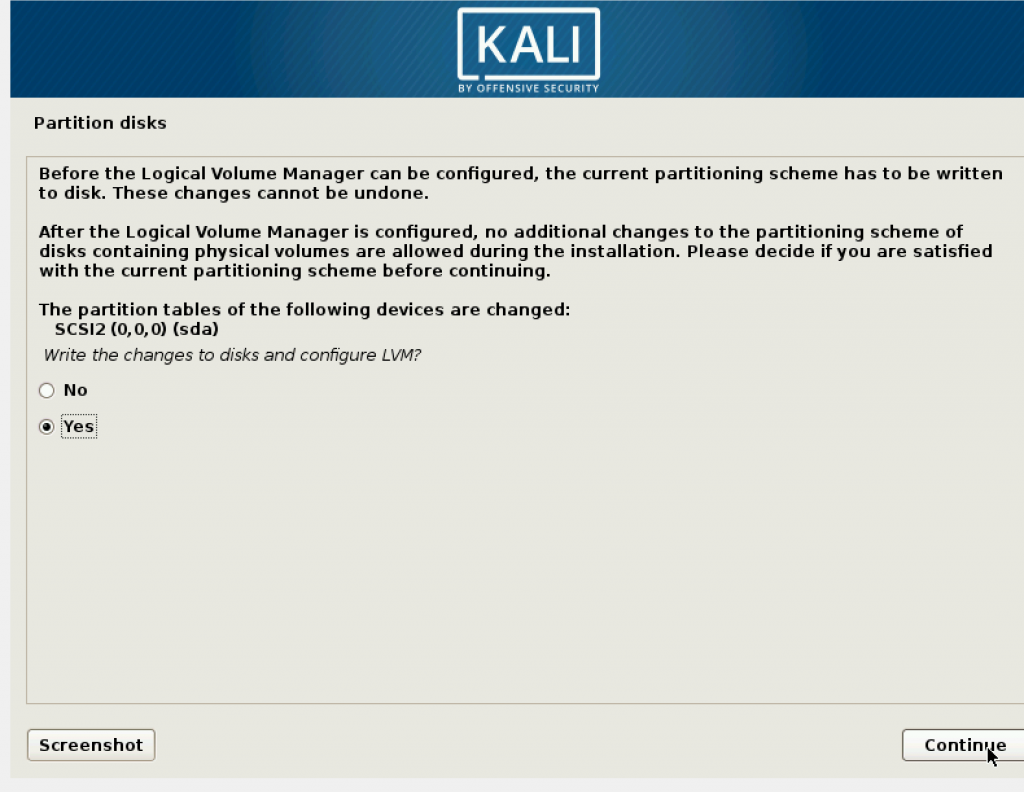
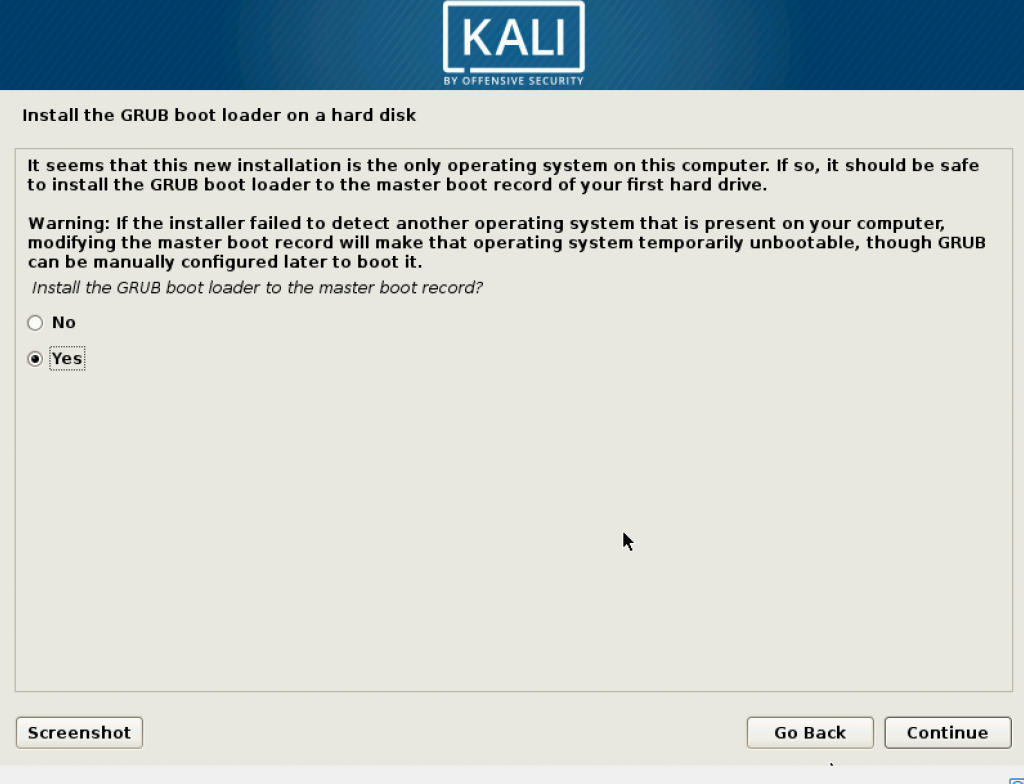
Select Yes.
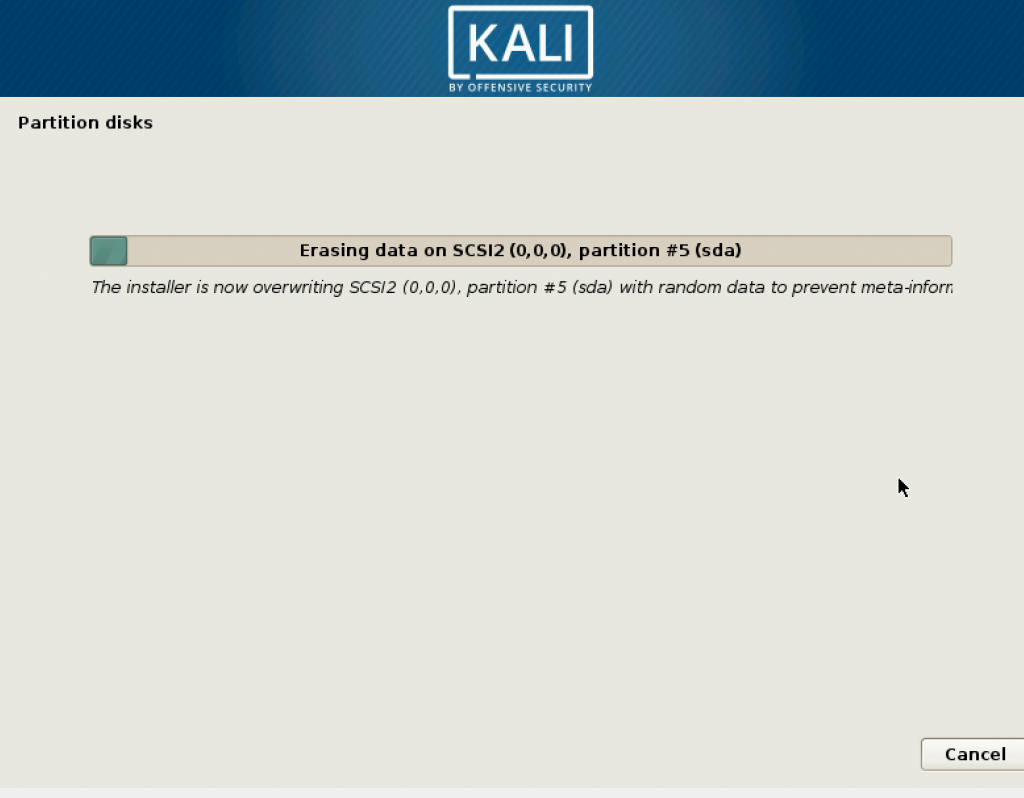
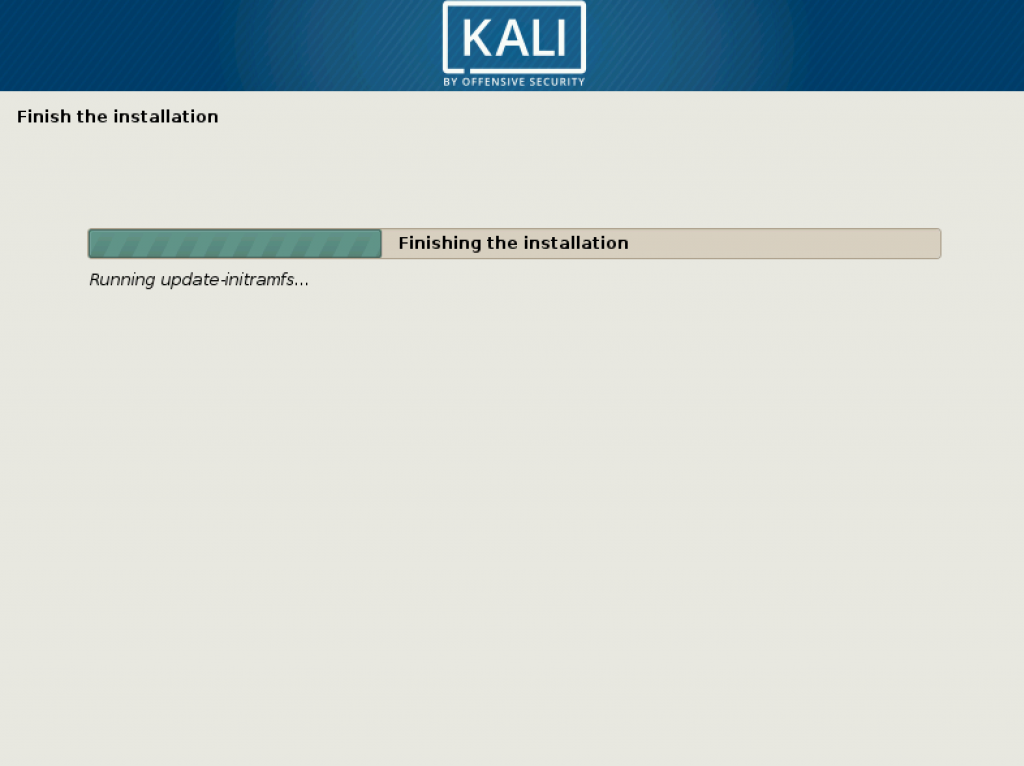
In this step, it will take a while, depending on the amount of memory you provided. If you gave 50 GB, it will take even longer.
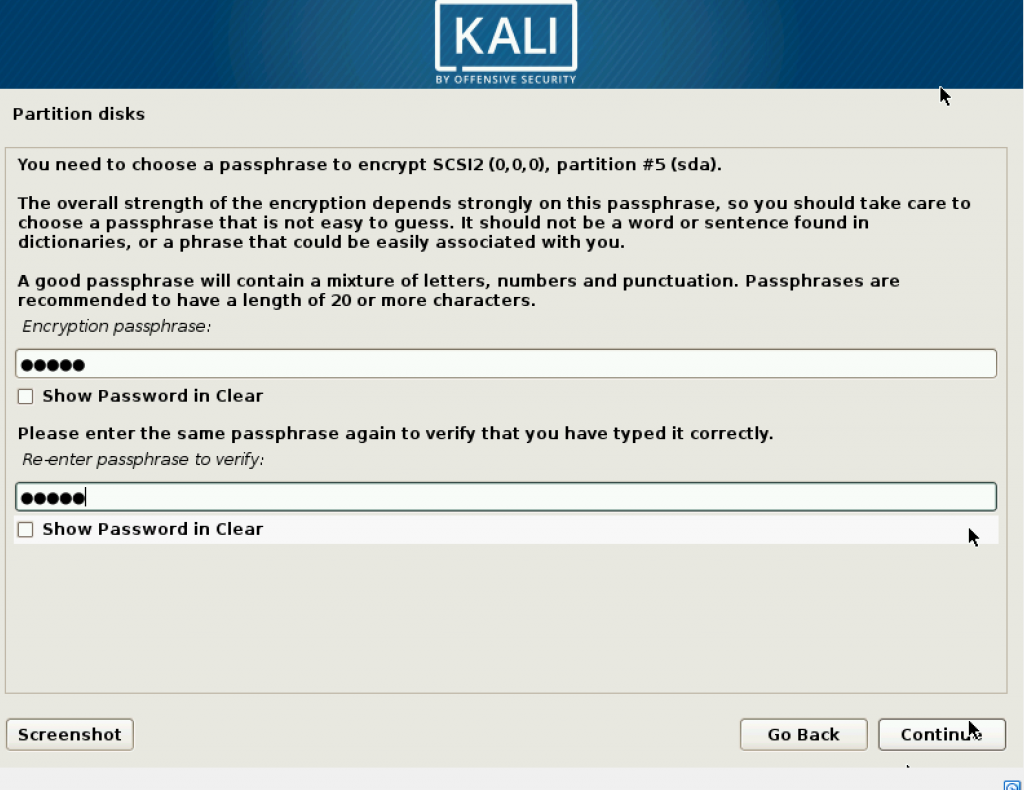
Set a passphrase which strengthens your overall security. When you log in, there will be a black screen asking you to enter this passphrase.
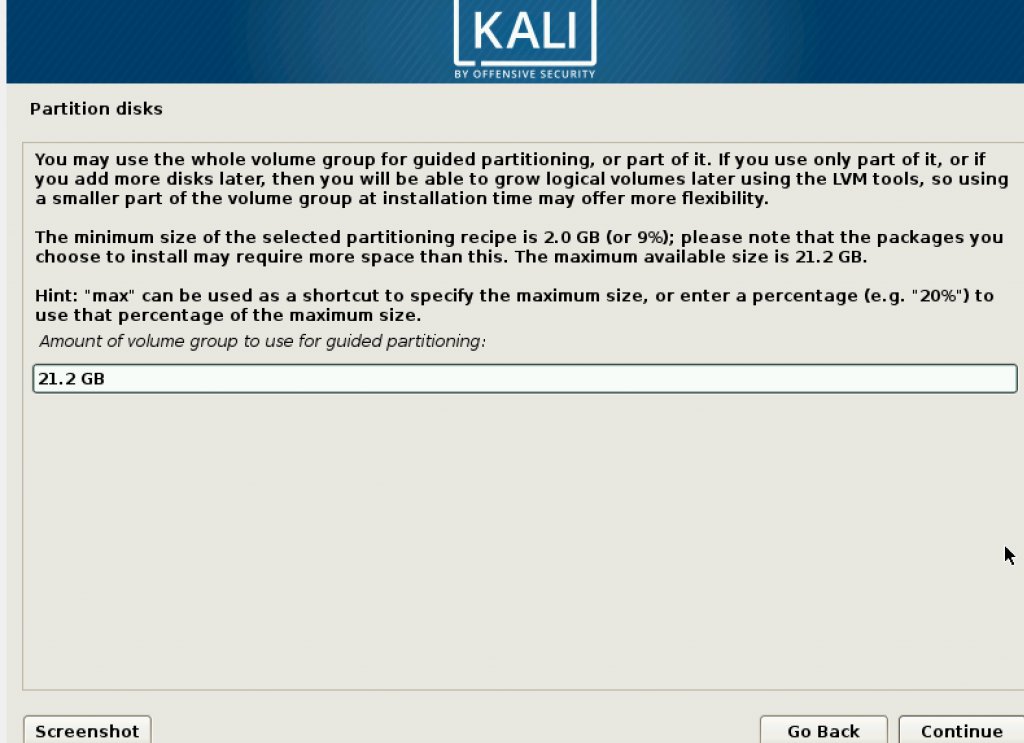
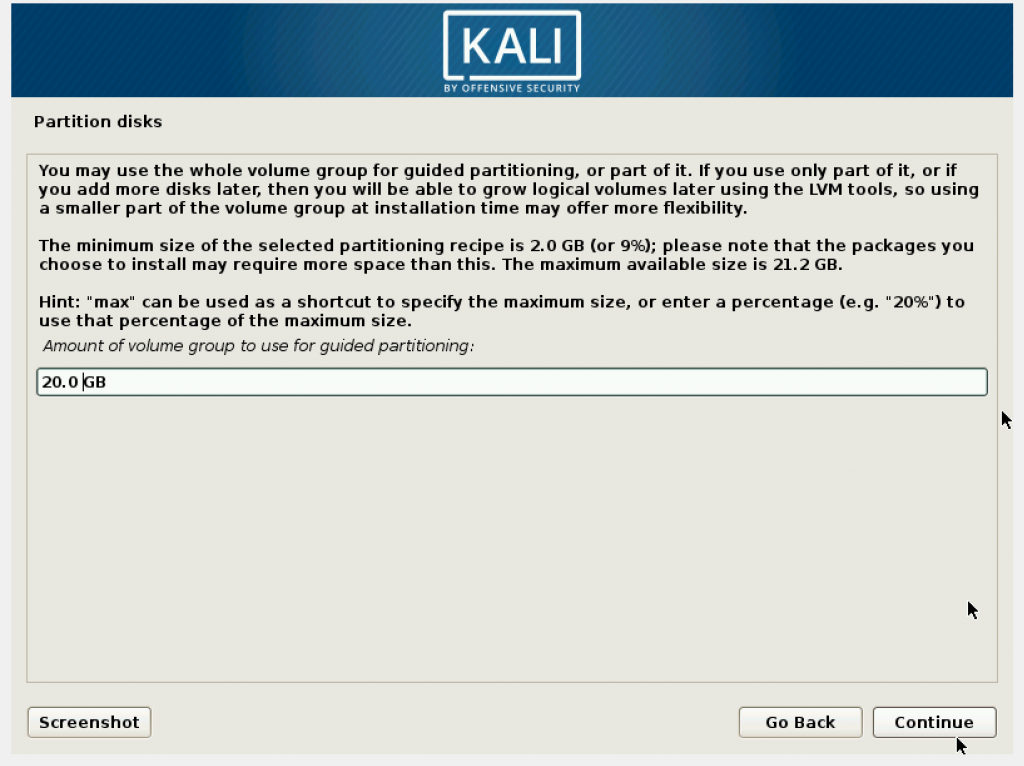
The next is the amount of volume group. Be aware that the size mentioned here is bigger than the memory you provided. It will cause problems later during installation. Make it to the same size as the memory you provided.
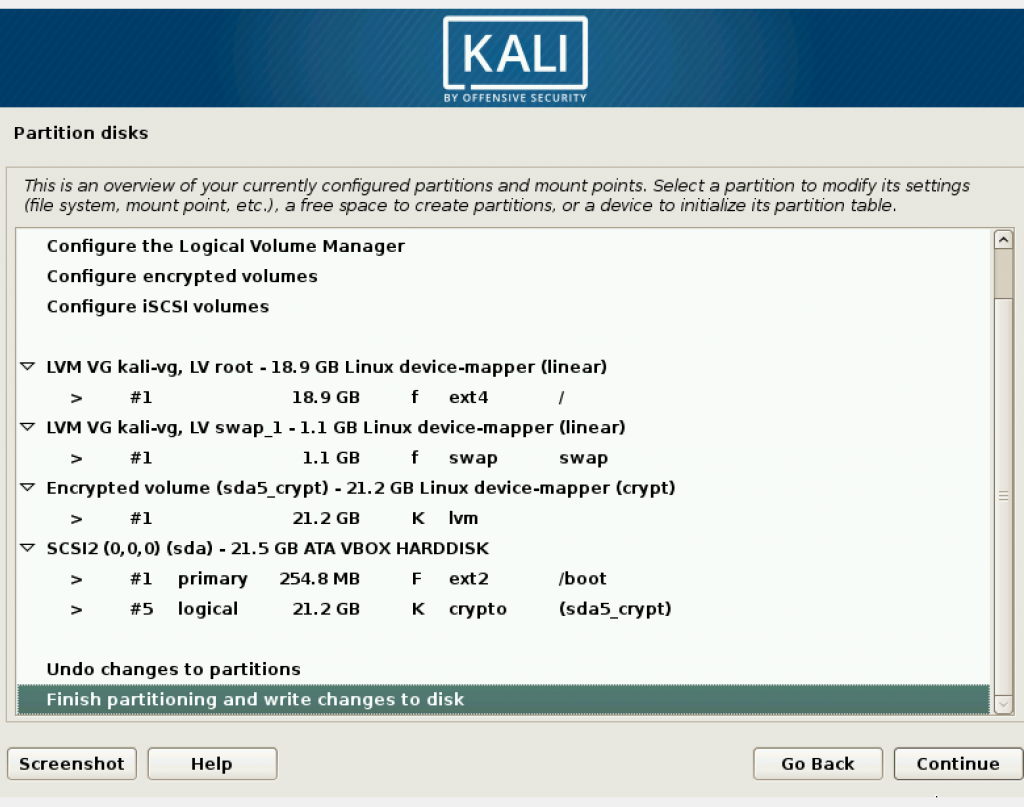
You may leave the next step blank.
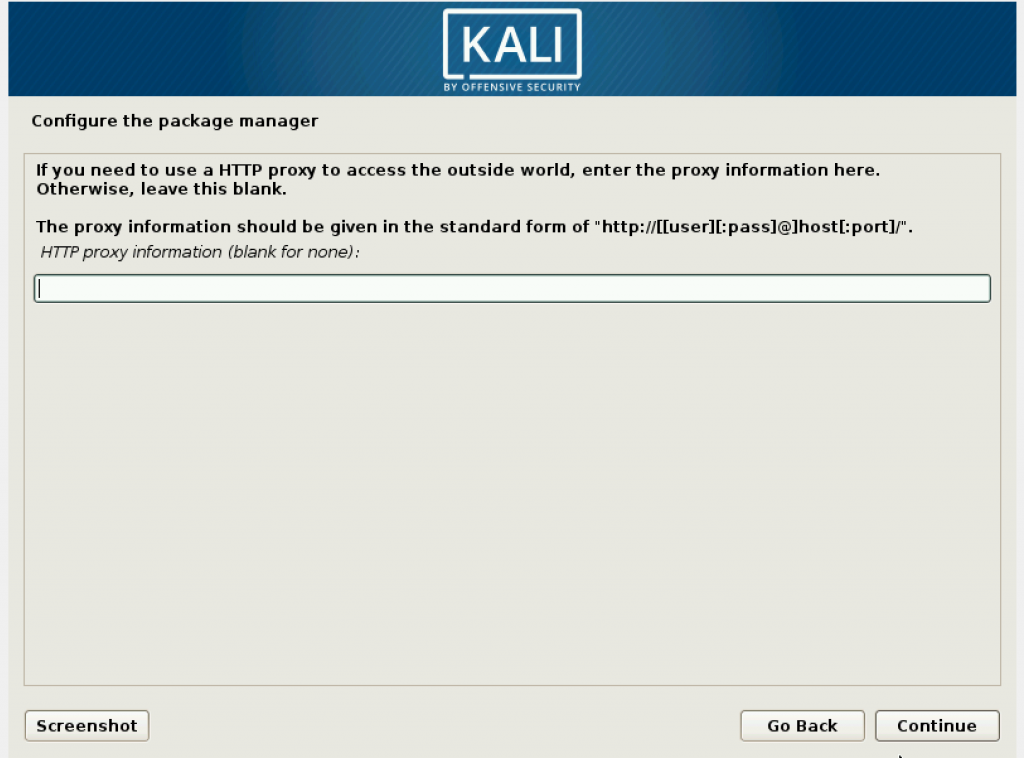
For the next few steps just click on Continue.
Then when choosing where to store GRUB, put it in /dev/sda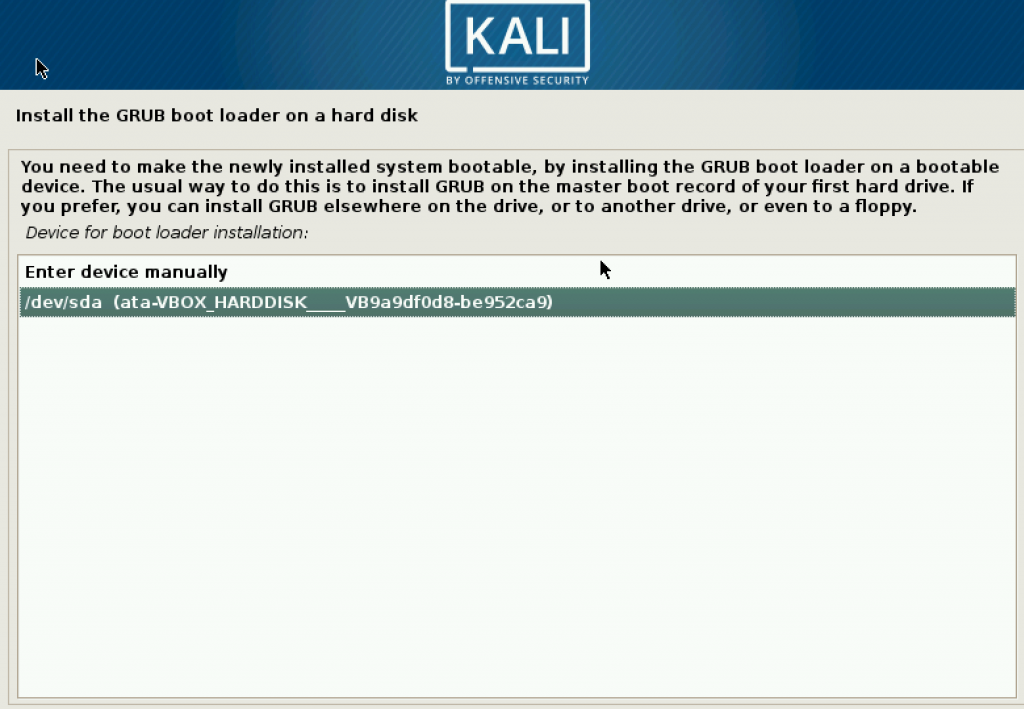
Just click on “Continue”.
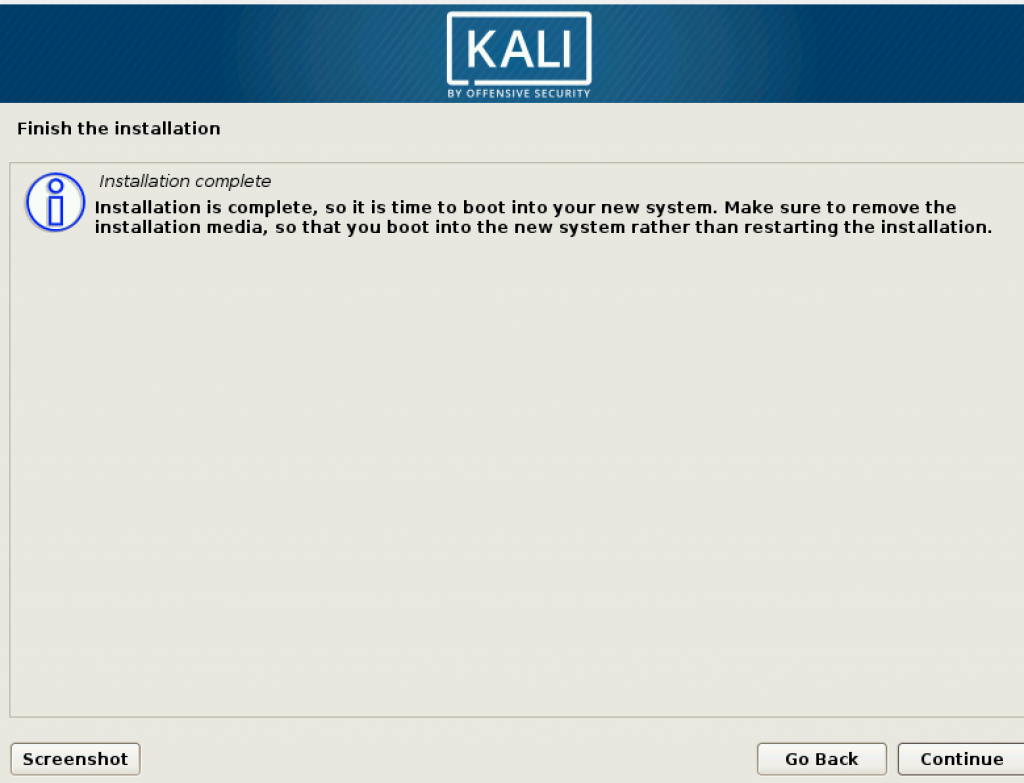
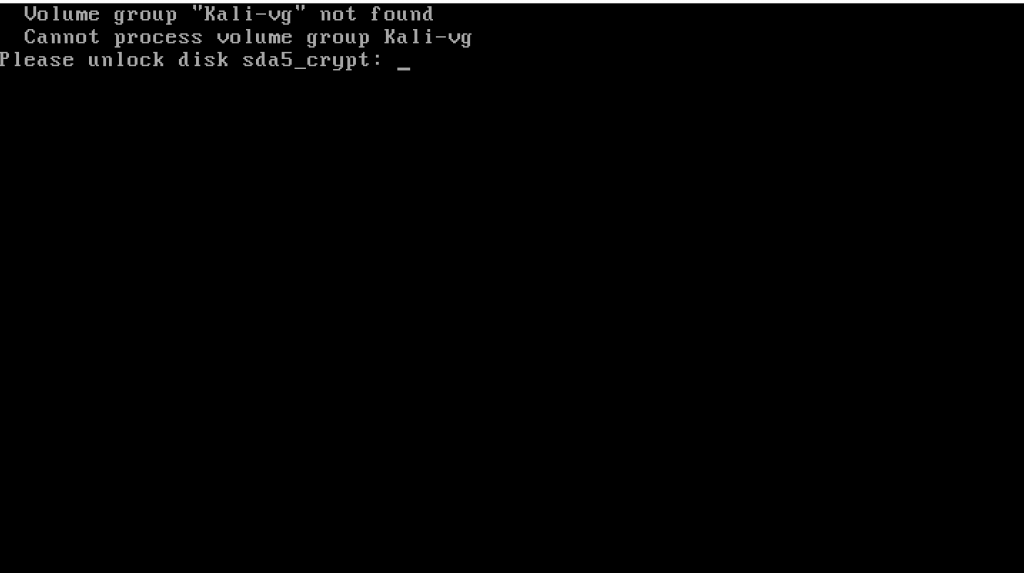
When it restarts, enter the passphrase to decrypt the encrypted Kali Linux.
Mutimedia and Human Computer Interaction Project Report
November 19th, 2018
For our final project prototype, we used Construct 2 to create the educational game. We slightly tweaked the survival game’s theme from what we proposed in the project proposal. The educational values we think are in the game is the biological basic needs of living things to survive such as water and food, food chain, and also a healthy ecosystem with balanced numbers of carnivores and herbivores.
Game Documentation
The game starts with the menu screen.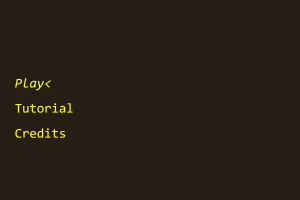
When the user presses on up or button arrow, they can navigate through the menu with the “<” pointing to the menu choices. When the user presses enter to choose, they can go to another screen from the choice they have chosen.
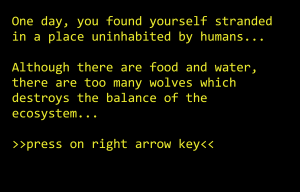
If user chooses play, the game screen will appear, but it starts with the story line explaining the player’s mission in the game, which is to survive and protect deers before the game starts.
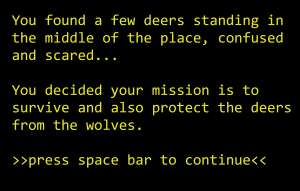


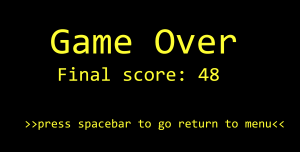
For each second the player survives, additional score is given. Hunger and thirst will keep increasing which means the decrease in numbers. When the number reaches 0, health will start to decrease and when the health reaches 0, the game is over.
The wolves will keep spawning in numbers as they move towards the deers, the player will need to hunt them from coming close to the deers. For every wolf hunted, the player “eats” it and increases the number in hunger. For the thirst, there are lakes nearby which the user can get close to and drink water from.
There are initially 3 deers. If all the deers are hunted by the wolves, then the game is over.
So there are two ways for the game to be over, thus increases the game difficulty.
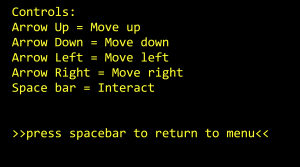
In the tutorial menu choice, the tutorial explains which keys on the keyboard the user needs to press in order to play the game.
Arrow keys to move the player sprite and space bar to interact with the lake and wolf.
The credits menu choice shows the credits on which pictures and sprites we used from, the music and sound effects we used for the game, and also our group members’ names.
Team members
Stefan Liemawan – 2101694690
Contribution: Gameplay, Events, Actions, Layout Design
James Barlian – 2101695176
Contribution: Music, Sprites, Ideas
Cindy Claresta Basrie – 2101693845
Contribution: Gameplay, Menu, Concept Design
Internet Sources
MAIN CHARACTER (human bases)
Art by Antifarea and Clint Bellanger for
OpenGameArt.org (http://opengameart.org)
DESERT TILESET
Free Desert Top-Down Tileset by Franco Giachetti is
licensed under a Creative Commons Attribution 3.0
International License.
License details:
http://creativecommons.org/licenses/by/3.0/ attribution
to LudicArts.com
DEER
Deer by Calciumtrice, usable under Creative Commons
Attribution 3.0 license.
WOLF
Attribute Stephen “Redshrike” Challener as graphic
artist and William.Thompsonj as contributor.
https://opengameart.org/content/lpc-wolf-animation
Project Proposal for Multimedia and Human Computer Interaction
October 5th, 2018
For the course Multimedia and Human Computer Interaction, our group will be making an educational game from Construct 2. About the game, we will be making some sort of survival game, which is educational, as it teaches the science aspect of our daily survival needs. The goal of the game is to survive and stay alive longer. The player’s health will decrease as time goes and the player will require to forage for his daily necessities to recover his health, otherwise his life will forfeit. The game does not only provide beneficial items for the player’s needs, but also provides harmful things such as diseases, expired or unhealthy food, and poisons.
This idea will be further improved and updated in the future if our group decides to add or reduce some ideas.
Our group consists of:
- Stefan Liemawan 2101694690
- James Barlian 2101695176
- Cindy Claresta Basrie 2101693845
Database Systems Final Project Report
July 10th, 2018
For our final project prototype, we used Visual Basic to make the program and MySQL for the database. For what our program is, it is a prototype program for a store that records transactions and also displays the items that exist in the shop or the details of the item and also the details of employee working in the store.
The ERD
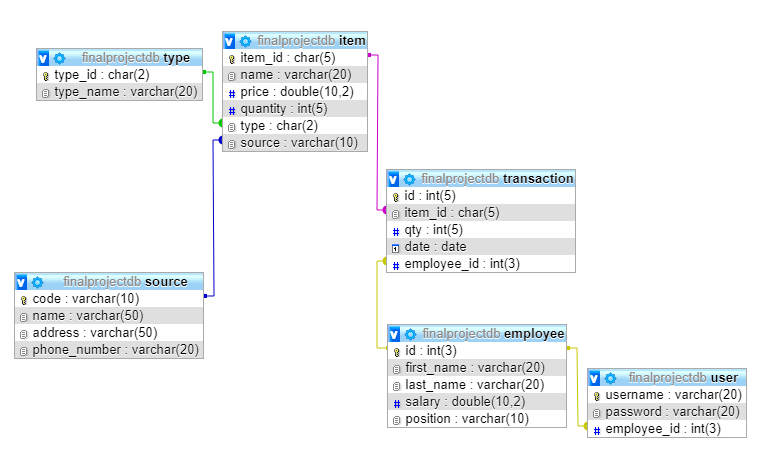
The type table refers to the category of item. The source table is the company the item is obtained from. User table is the username and password for the employee to log in. Transaction table stores the data of the transactions and we can which transaction is being handled by which employee.
Relational Schema
Type(type_id, type_name)
Source(code, name, address, phone_number)
Item(item_id, name, price, quantity, type, source)
Foreign Key type References Type(type_id)
Foreign Key source References Source(code)
Employee(id, first_name, last_name, salary, position)
User(username, password, employee_id)
Foreign Key employee_id References Employee(id)
Transaction(id, item_id, qty, date, employee_id)
Foreign Key item_id References Item(item_id)
Foreign Key employee_id References Employee(id)
Normalization
UNF:
Transaction(transaction_id, item_id, item_name, item, item_quantity, item_price, item_type_id, item_type_name, item_source_code, source_name, source_address, source_phone, transaction_qty, date, employee_id, first_name, last_name, salary, position, username, password)
1NF:
Transaction(id, item_id, qty, employee_id)
Item(item_id, name, price, quantity, type_id, type_name, source_code, source_name, source_address, source_phone)
Employee(id, first_name, last_name, salary, position, username, password)
2NF:
Transaction(id, item_id, qty, employee_id)
Item(item_id, name, price, quantity, type, source)
Type(type_id, type_name)
Source(code, name, address, phone_number)
Employee(id, first_name, last_name, salary, position)
User(username, password, employee_id) <– because username cannot be redundant
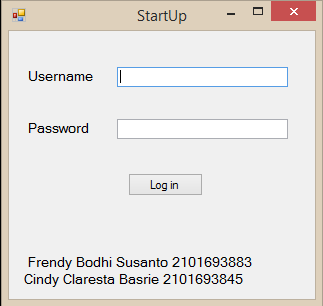
For the user instructions:
At first, the user is given a login form. The user logs in with the appropriate username and password that exists in the database. The login form checks the user’s position in the database and gives the appropriate form to the user. If the user is an admin, they will be given admin form. If the user is a cashier, the user will be given cashier form. If the user is the stock manager, they will be given the form to add stocks of the items.
For the admin form, the user will be shown the transaction history. If the user wishes to look at other tables, they can check another radio button at the bottom to show the table they want to view. The update button is grayed out for every table and it will be available for clicking if the user clicks on a row in the table which shows the data in empty text boxes.

The Add button is to add a new record into the database. When clicked, the user will be given a new form to fill in.
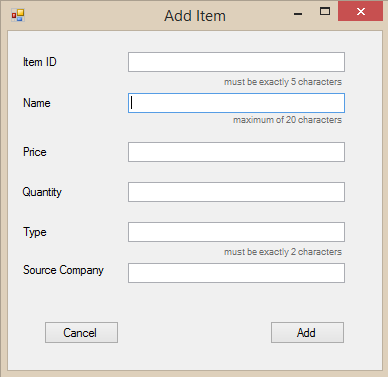
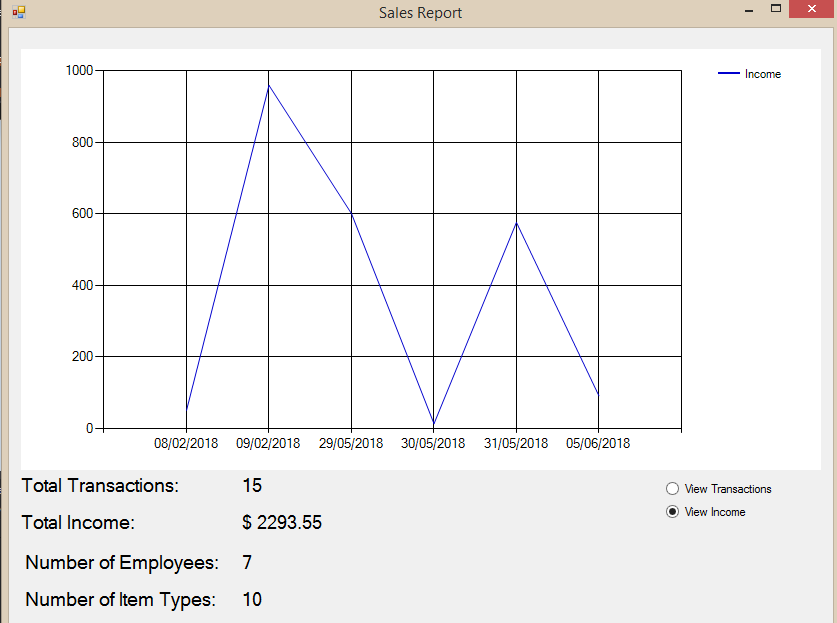
The report button is to show the current state of the shop such as the income and also the number of sales.
However, the admin cannot add records into the transaction table because the cashier is the one responsible for all the transactions and they also cannot update the quantity of the items because the stock manager is responsible for it.
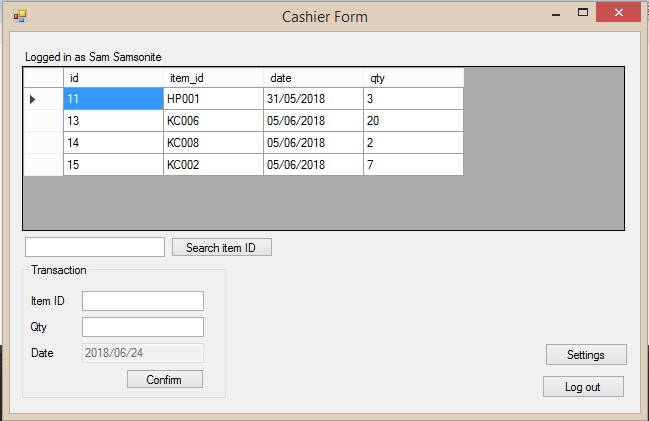
For the cashier form, the table shows the transactions the user had done previously. The cashier can only put in item ID and the quantity to be bought. The date will be automatically set as today.
The stock update form is the same like cashier, except it updates the number of items in stock and the table they view is the items and the quantity available right now.

For the search item ID field, the user can input any part of the item’s ID into the field when the button is clicked, all of the item containing what was typed into the text box will be shown.
The settings button in all the forms is for the user to change their username and password to their own choice of username and password.
The log out button is for the user to return to the login form.
NutsMarket (Final Project Proposal)
May 8th, 2018
For the course Database Systems, we are planning to make a NutsMarket, a supermarket that sells nuts and some other items.
Group members:
- Frendy Bodhi Susanto 2101693883
- Cindy Claresta Basrie 2101693845
Items:
- Food
- Almonds
- Sunflower seeds
- Lotus seeds
- Melon seeds
- Pumpkin seeds
- Pistachio
- etc.
- Drink
- Soy Milk
- Almond Milk
- etc.
My part in this project:
- Making the forms using Visual Basic
- Testing functionality and debugging
Introduction to my blog!
March 20th, 2018
This blog is an assignment by my lecturer where I will be introducing, explaining and showing my projects here which I might be doing as group or individually.
Follow me to Computer Science Program in BiNus University!